Tuesday, August 31

Planning for the Holidays


Every year, around Mid-August, I start planning for the Holiday Season.
So many people joke, and roll their eyes at me, but really, it makes such a difference not only financially, but also mentally. Early planning takes most of the stress out of the Holiday's, which allows our whole family to slow down and just enjoy what each day brings.
I thought I would share what I do to plan ahead.
First, just like Spring Cleaning, I do a Fall Cleaning too. Not a massive overhaul though, just a little bit at a time. Organized Home is site that has been soooo helpful to me, I really suggest taking a look at it. They have free print out lists to help you stay organized during the season. The best part (in my opinion), is that they broke down all the prep work into weekly goals for you to follow. Check it out here, I promise you won't be disappointed!

Second, I have a list of everyone I plan on giving a gift to. I keep the same list for each year, so I only had to make it once. From there, I start filling in what I want to either make or buy for each person. I try to put as much thought as possible into gift giving - that's what makes it fun! What's nice about having the list is that when you notice someone mention something they love, or want, you can make of note of it, and have it for the future. This cuts down on so much wasted time. You could keep this list on your phone so you will always have it with you.
Third, I typically finish up my Christmas cards by the end of September. I like to hand write all of them out, which can be time consuming. Whenever I have a few spare minutes here or there, I'll fill a few out and address them. I wait to stamp them until 2 weeks prior to Christmas. When they're all done, I just set them all aside in a bag and pull them out when it's time to mail them off.

Some more ideas.....
- If you have enough freezer space, start making two batches of whatever you cook for dinner, and freeze one for those busy Holiday weeks.

- Make a list of the handmade gifts you want to give (if any), and plan accordingly.
- If money is tight, consider baking or mason jar gifts.
For now, that's all I can think of. We don't obsess about the Holiday's, or go overboard on this or that. Doing these few simple things allows me to focus more of my energy on the spirit of the season with my children, and I feel that's the most important part.
Take Care!
~Lisa :)

Monday, August 30

Hannah's Night Dress


Is huge.....
I love this fabric, it has a vintage feel to it, even though I'm pretty sure it's not. The fabric came from Granny Grace (thank you so much again!), and I used Betterick pattern 4647. I left off all the extra trim it's supposed to have. I like a more simple look -in my mind however, this turned out a bit different, lol.

Hannah loves it though, in case you couldn't tell from the photo's of her dancing around the living room. I should mention, she does have a tendency to pick up any large piece of fabric and start hugging it while declaring that it's "Hannah's Dress!" - seriously.

Maybe in a few years she'll grow into it. Just in time for her to decide that it's not pretty any more. Something tells me she'll be a bit more opinionated than she is now, all though that's hard to imagine!
I have enough fabric left over to make Austin a pair of pajama pants, and maybe a pair of ruffled house shoes for Hannah too... And of course I'll share those with you when I finally get to them ;)
Take Care!
~Lisa


Sunday, August 29

Buttermilk Biscuits

These turn out sooo good every time!

My family loves them, and they freeze great too. I typically make a double batch and free most of it so I can conveniently pull out as many as I need and them warm them up before serving. They go well with dinners with a little butter, in the morning with some jam, and my son's all time favorite - biscuit, egg and cheese sandwiches.


What you need:
4 C Whole wheat flour (or 3C whole wheat + 1C unbleached white for a lighter texture)
1 Tbsp sweetener (honey or raw sugar)
1 Tbsp + 2 tsp of baking powder
2 tsp salt
1/3 C Coconut oil
1/3 C Cold Butter
2 C Buttermilk
1/4 C Buttermilk

1)Preheat your oven to 400 degrees and line a cookie sheet with parchment paper.

2)Combine flour, sweetener, salt and baking powder. Stir well.

3)Cut in coconut oil and butter until you get a mealy texture.

4)Add 2 Cups buttermilk and mix until just moistened (make sure not to over mix or your biscuits will sink and spread).

5)Roll out to 1 inch thick and cut into biscuits.

6)Place on the parchment paper about 1.5" apart and brush the tops with 1/4 C buttermilk.

7)Bake until golden - usually 18-25 minutes - keep an eye on these, they burn easily.
Take Care!
~Lisa :)

Saturday, August 28

New Feature!

Good Morning!

I just wanted to make sure everyone knew about the new recipe tab at the top of the page. Now you can quickly and easily find whatever recipe on my site you may be looking for. It will be updated on a regular basis, so please check back often.

You may have also noticed an inactive "Shop Artysmomma" tab. That will be working soon, and will hold some of my handmade items for sale, as well as knitting patterns that I have designed myself. But more on that another time...

I have a whole 'lotta buttermilk to use up today, so I'm sure I'll be posting another recipe for you all tonight.

Take care and enjoy the beautiful day!
~Lisa :)

Thursday, August 26

Make Your Own knitting Needles


If you've been hanging around this blog for a while, then I'm sure you already know just how much I LOVE to knit (or how obsessed I am with it, depending on how you look at it, lol). My knitting is like my third arm, a project is with me at all times. You never know when a free moment will present itself, and I always want to be able to take advantage of it. That being said, I typically have at least 4 projects going at once, and I have been running out of knitting needles.
I shared this little dilemma of mine with my mom and grandma the other day, and the response I got was "well, why don't you just make some more out of dowel rods - it's cheap and easy." Why didn't I think of that???

Sooooo, here it is! A tutorial to make your own knitting needles! It's super cheap, super fast, and super convenient! Just think of all the projects I can have going at once now! :)


You will need 2 dowel rods of any length or width, a pencil sharpener, glue, beads (optional), and ultra-fine sandpaper.


Sharpen one end of the dowel rod like you would a pencil. If you want to make double sided needles, just sharpen both ends.


I try not to sharpen the dowel rod so that it makes a pointy tip, but if you do, just either snap the tip off, or dull it with the sand paper.


Take you sandpaper and wrap it around the sharpened end, and twist it around to smooth out the wood. Notice my dark nail polish?? That's my way of telling the weather it's time for fall, lol.


If you want to dress your needles up a bit or add some weight, glue a bead to the un-sharpened end.


That's it!


In order to know the size of your new needles, you will need a knitting needle gauge.
These are also great for knitting with wire.
I hope you enjoyed this tutorial!
~Lisa :)


Wednesday, August 25

Clean Up Your Diet - Get Rid of Scientific Food


I have always considered myself a pretty healthy person. I’m a personal trainer, I’ve taken more nutrition classes than your average doctor is required to complete, and I’ve always strived to follow whatever recent science has deemed the healthiest choice at the moment.

The funny thing about this though, is that deep down, I always knew something wasn’t right. So I started down a very long and frustrating path of adapting different “diets” into my life.

I followed a vegetarian diet off and on through out adolescence, and then chose to follow a strict vegan diet. During this time my skin cleared up, however, I lost quite a bit of energy, was always hungry, and started gaining weight. So, I did what most average teenage girls think to do, I restricted more and started following the Pritkin Diet, and then the Ornish Diet. Those flopped as well, and a few years later I tried the South Beach Diet, and then Atkins.

Still, something seemed off.

I couldn’t figure it out, but I knew I should not be turning my back on fruits and vegetables, or whole grains. Now, 16 years later, I think I’ve figured it out. Most people are aware of the sudden increase in obesity, heart disease and cancer over the last 100 or so years. Which led me to think, how were things different back then? Obviously people were much more active than we are now. Technology creates something new everyday which allows us to do less for ourselves – think about it, are moving stairs really that necessary? I think you get where I’m going with this.
Well how about our food…I’m pretty sure Twinkies and vegetable based fake butter spreads were not around back then, and even if they were (or something similar), they most definitely were not consumed on a regular basis. Read the back of one of these labels, I can almost guarantee you don’t know what all the ingredients are.

Here’s a rule of thumb, if you can’t pronounce it, it’s probably not good for you. To make a long story short, the majority of mainstream food now contains loads of additives, preservatives, chemicals, bleaches, dyes and poisons. In order to clear out the “junk” from my family’s food, I’m making small adjustments each month to move towards a healthier lifestyle.

It has been proven time and again that in order for something to become a habit, you need to do it for at least 21 days – so I think a month should be suitable. I plan on creating a step-by-step plan to follow, and I will post these here for you to do the same if you decide to take the same path our family did.

I strongly recommend reading the book Real Food by Nina Planck – she does an excellent job at covering all the details about figuring out what real food really is, how to go about obtaining it now, as well as clearing up all of the “what’s healthy for you” confusion and dispelling some major myths our government has had us believing for years. Her book, as far as my research can tell me, is accurate, and it is well documented.

As I said before, I have always considered myself pretty healthy, so I was shocked at the difference I felt almost immediately once I cut out most of the additives. To give you a quick overview of what were doing – we stopped drinking everything but filtered water and organic whole milk (occasionally we’ll buy 100% OJ, or pressed apple juice to add to smoothies), I started making all of our breads and crackers by hand using high quality whole grain flour (really not that time consuming – I bake everything for a month in one night and freeze the extras). We snack on fresh fruit and vegetables, or homemade muffins, crackers and biscuits. Pretty much everything refined is off-limits – but there will be more on this later.

It's actually much easier than I had anticipated, it just requires adapting our old recipes, and a little planning ahead.

Within two weeks, I was sleeping better at night (and needing less of it), I had a TON of energy, my mood improved, my skin started clearing up and the color of my skin improved (other people have noticed this as well). My 5 year old’s attention span increased noticeably and his moods have improved. I could go on and on and on – and maybe I will another day, but I can honestly say I really believe this is one of the smartest decisions I have ever made.

Tuesday, August 24

Fabric Covered Paper Airplanes

Austin just LOVES paper airplanes right now. I'd even venture as far as calling him obsessed at the moment. He'll play with them for hours, and the game typically ends when the plane lands in the dog's water dish. Never fails, it always ends up in there. And my little boy can't seem to convince the paper to get along with the water better, lol.

Sooooo, when I came across a tutorial for a fabric paper airplane over at Everyday Chaos, I got pretty excited. I was sceptical at first if it would fly, but it did! I didn't use the template she has. I just cut out an 8.5 x 11 piece so I could construct the plane the way I normally do out of paper. I'm not one to reinvent the wheel, so if you'd like to give it a try, you can see the tutorial here.


Our first attempt, which has survived not just one, but TWO water dish landings!

This was a pretty quick project, well worth the effort for sure. I have a feeling this will not be our last fabric airplane.

Have a great day everyone!
~Lisa

Monday, August 23

Garlic Bread Pizza

I'm making this for dinner tonight, so I figured it would be a good day to post the recipe. I actually came across this accidentally, and my family LOVED it. Definitely a favorite around here, by everyone too, which does not happen often. Truth be told, last time I made pizza, I was too lazy to make pizza sauce, so I substituted a little oil and garlic, lol.


What You Need:
Pizza dough
Shredded Cheese (we use three - Mozzarella, Cheddar, and Parmigiano Reggiano)
2 Tbsp of Olive Oil
2 spoonfuls of minced Garlic
Dried Basil & Oregano (optional and to taste)

Preheat oven to 350 degrees.

1) Roll out your dough and place in pan or on cooking stone.

2) Brush olive oil over the entire surface.

3) Add the minced garlic and spread out evenly.

4) Sprinkle the cheese on top, use as much as desired. I never measure my cheese out, so I don't know how much I actually use, but it's typically a lot.

5) Sprinkle dried spices on top if desired (my son won't eat "the green specks", so we only do half).

6) Bake in the oven for 25-35 minutes, or until nicely browned on top.

This is sooo easy and sooo good! It hardly takes any time at all when you use pre-made pizza dough. We make our own in large batches and freeze it, so I just pull out a bag of it in the morning to thaw. You can find that recipe here.

Friday, August 20

Back to Routine

Things have been quiet over here for a few days. We went on our first vacation as a family, and had a wonderful time! I think it will have to become an annual event for sure. Then of course, we had to recover from our vacation. That first night back always seems overwhelming, between unpacking and the sinking feeling that life has to go back to reality again. Although I do find comfort in our routine, so I guess it's good to be back :)


This morning was Austin's very first day of kindergarten - all day! It has been odd to say the least, I just hope he's having a great time.

Hannah fell in love with the beach instantly! I need to find one closer for her.

And Austin has always loved it...


Another vacation picture...


I loved this little school house. I'm getting more and more interested in antiques lately...


This one is hard to see, but it's Austin enjoying his very first Smore.


This was right by the river. I don't think I need to say much more about that...


We had a great time, and are settling back into our routines. I've got plenty of projects to share with you all (of course I brought my knitting!) As well as some new tutorials, so please check back often.
Enjoy the rest of your day!
~Lisa


Friday, August 13

Thank You!

I have a bunch of thank you's in order for a lot of people. I feel like it was just my birthday, and not Hannah's, lol. Last Friday, I was surprised at work with a HUGE duffel bag of FREE fabric - seriously, free! And sooo cute! I've already started planning up a bunch of projects, now I just need to find some more time, hmmm..... So a big 'ol Thank You! to Sweet Granny Grace :)

I also was given two dozen farm fresh eggs for free! I know, I'm lucky! (and it's gets better...) So thank you Mike, that made my day in a number of ways.

And last, but most definitely not least, and HUGE Thank You! to a friend of ours who is letting us borrow his cabin for a few days so we can have a last minute family get-a-way. This is super exciting, because it's the very first time in the six years we've been together that we will be taking a vacation solely for the purpose of taking a vacation. I'm excited, and extremely grateful!

A few other things to be thankful about....


My little guy, eh em, Big Guy, building up the courage to tackle the "Big Kid" slide at the fair.

Look, no hands Momma!


Morning dance parties in our living room (hope the neighbors don't mind!), in the new pajama pants made from some Sweet Granny Grace fabric :)


Enjoy Your Weekend!


Thursday, August 12

Homemade Berry Ice Cream


I mentioned earlier this week that we started making our own ice cream, and it's sooooo good! I want to share the concoction we came up with yestserday afternoon, it's pretty good. I used an ice cream maker (1 quart) for ours, but I'm sure you could pour the mixture into a glass container and stir it a few times before it completely froze to give it the creamy texture.


What you need:
1 C Heavy Cream
1 C Whole Milk
1 C Fresh or frozen whole blueberries
1/4 C Strawberry Jam
1/8 C Honey
1 tsp Vanilla


1) Pour the heavy cream and blueberries into a blender and liquify.

2) Add the whole milk, strawberry jam, honey and vanilla and blend until well mixed.

3) Follow the manufacturer's direction on your ice cream maker, or pour the liquid into a freezer safe container and put in the freezer.
Enjoy!
~Lisa :)

Wednesday, August 11

Happy Birthday Baby Girl!


My baby girl is 2 today, and I wanted her to have her own day on the blog as well.

Wow, I can't believe it's been two years since she was born! She has been such a joy since the moment we first held her. She still MUST have Piggy with her all the time. Thankfully we haven't lost him yet, though there have been so many scares, I think he might have to be put on house arrest :)


She just LOVES her "berry cake", so naturally, that's what we had to have for her birthday. On, of course, the strawberry cupcake stand I made for her last week.


Coloring is one of her favorite things to do, but the poor little girl is constantly sticking those crayons in her mouth. I'm not quite sure what they're made of, and long story short, it freaked me out. My solution? Crayon Rocks! Love these! They're made from bee's wax, soy, and minerals, and are completely non-toxic. She's a lot more interested in her "color rocks" than regular crayons, and is learning all of her colors with them as well. These were probably one of the best gifts she got.

Here she is in the birthday dress I made her. I don't think she really knew what to do with the ribbons and paper...


My baby girl also loves her balls. And I LOVE that her big brother was thoughtful enough to know that, and pick out the biggest pink ball he could find, just for her. She's lucky to have him, he really is so good to her. I hope it stays that way...


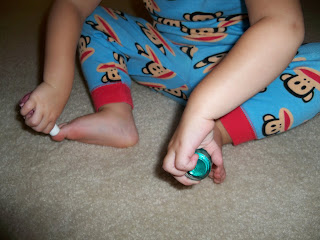
Hannah loves guessing the colors of my toenails, and is always asking for "pretty toes", so I figured it was time to let her. After a long and drawn out search for non-toxic, earth friendly nail polish, I finally decided on Piggy Paint, and I can't recommend it enough! I might just switch over to that myself. Their tag line is, "It's as natural as mud", and it is.


The minute I opened the box holding these adorable hand-knit socks from Nana, Hannah dropped to the floor and stuck her foot in my face. Which of course meant, put those on me NOW Momma.


My little Miss Priss is getting all grown up....


Tuesday, August 10

Homemade Gnocchi


I came across this recipe the other day, and didn't believe the title that it would only take 15 minutes start to finish. Honestly, if someone told me you could make gnocchi from scratch in under 15 minutes, I would think they had lost their senses. The recipe is in grams, so I have the converted measurement's in cups below. You should really give this one a try if like Gnocchi, it's really great, and I swear, it really takes less than 15 minutes start to finish. This is my new go-to recipe for last minute dinners.

What you need:
1 C Ricotta Cheese (drained)
1 Egg yolk
1/4 tsp fine sea salt
1/4 C of Fresh Parmesan Cheese (you need to use freshly grated cheese, or it will be gritty)
1/2 C Flour + more for dusting
Original Recipe

This is in no way shape or form my own recipe, so I don't feel right posting it on my site, so here is the link to follow that will take you through step by step. This is meant to serve 2, however, it was enough for myself and my children, with some left over - so it makes for a pretty frugal meal as well.
Enjoy!
~Lisa


Monday, August 9

BLT Wraps


I hope everyone had a wonderful weekend! I've been in a major cooking mood lately, so I thought I would share some more of our favorite food recipes, and a new one or two that I've tried lately. We started making ice cream from scratch this week, and I swear, I'll never go back to the store bought stuff - it's seriously THAT good.
I thought a quick and easy dinner recipe would a nice way to end a Monday. So here it is, one of our favorites. I always have bags of my homemade tortilla shells in the freezer to pull out when needed.

What you need:
1/2 head of Romain Lettuce
1 Package of Bacon
1 Large Tomato
Mayonnaise to taste
1) Cook the bacon the way you like to serve it. I always overcook mine, I like it almost burnt. I also bake it in the oven so I don't have to worry about the splatters hitting one of my children (they love to be in the kitchen when I'm cooking). To do this, just line the bacon in a single layer along a large foil covered cookie sheet, and bake for 20-30 minutes at 425 degrees.
2) While the bacon is cooking, chop up the lettuce and the tomatoes and put in a large bowl.
3) When the bacon is done, drain it and then tear it into pieces and place in the bowl.
4) Add as much mayonnaise as you'd like and mix everything together. I usually add a very large spoonful, and that ends up being plenty after it's mixed around a bunch.
5) Spoon the mixture onto a tortilla shell, and roll it up to eat.

Friday, August 6

Right Now

Right Now
A weekly peek into our lives right now...


My little guy and his goofy faces - he has loads of them.

Austin's Mohawk hat that was a complete flop - next time I'll have to read the blend ratios better. So, hat number two is on it's way.

My first attempt at making Hannah's old jeans into a skirt. This should fit her for at least another year. I plan on making more so you can expect to see a tutorial soon :)


The accidental knit jumper. I had no idea what I was going to make when I started this, but I'm thrilled with the results. Pair it with a pair of candy cane striped leg warmers, and my little girl will be all set (should I add that the legwarmers are still just balls of yarn?).


Almost finished with my first sweater!


I tried making an elf hat with our a pattern, and it's too small. Looks like I'm going out to get a pattern...


A favorite part of our days.


Our Goober girl, she looks so intimidating in this picture, I love it. She's really just a giant lap dog.


Another favorite of ours...
Have a great weekend everyone!