Commercial haircare products are loaded with synthetic and a lot of times, dangerous ingredients. These, along with styling products build up on the hair shaft. Though it's probably not harmful build-up, it definitely does a number on your hair's shine and manageability.
Apple cider vinegar (ACV) is a known disinfectant and conditioner and can be used on hair. It's too concentrated to use undiluted - so it's suggested to do a 50/50 mix of ACV and water.I decided to give this a try, even though I don't use styling products. I've noticed my hair gets a little life-less for lack of a better term.
It worked wonderfully! I put the mixture in a spray bottle, and sprayed it on my scalp after washing and then all over my hair and let it sit for a minute before rinsing it out and then conditioning (I have very long thick hair and need the extra conditioning - those of you with shorter hair might be able to skip it all together!). The end result was fantastic! I could tell just by touching it that it was super clean, and softer. When my hair dried (I always let it air dry), all of the body came back and it was super shiny. Without saying a word about what I did, some women at work noticed how much better it looked.
I'm sold - and for less than $0.50!

Sunday, July 18
Saturday, July 17
Cleaning up Indoor Air
 I have been focusing on indoor air quality over the last few weeks. Studies reveal that the quality of the air in our homes can be up to 3 times as harmful and pollutant filled than the outdoors (and yes, this includes the inner-city). Think about it for a minute, all of the exhaust fumes, pesticides and allergens that are outside - multiply that by three and then shove it into a small contained space and take a deep breath. Yuck. Not to mention the average American spends about 90% of their time indoors.
Some causes of indoor air pollution include (but are not limited to):
- synthetic flooring
- VOC emitting paint (unless it says "Low VOC", you can assume you're getting a pretty hardy dose)
- Air "fresheners" (sprays, plug-ins, candles, etc...)
- Synthetic cleaning products
- Gas stoves and heating
- Furniture glue
- Pet messes
- Personal toiletries (perfumes, hairsprays, nail polish, polish removers, etc...)
The list goes on and on....
Aside from avoidance from some of these (obviously you can not avoid them all), you can add houseplants to each room in your house. Ferns and Orchids are especially good at "greening" up your air. If you have small children and/or animals, be sure to check the safety of the plant before you bring it into your home.
Still want a fragrance?
What better way to add an enticing aroma to your home than to bake fresh bread or cookies. You can also simmer sliced oranges, cinnamon sticks and lemons, or better yet, bake them on a tray at a low temp of about 150-170 degrees in your oven until they are dried out and then use them as potpourri.
Most importantly, open your windows as often as you can, especially in the evening. Outdoor air quality tends to be better late at night while less people are operating vehicles and machinery, and most buildings are shut down.
Friday, July 16
Exfoliating on the Cheap
Welcome Back!
A few weeks ago, I posted about my face cleaning routine (which is super simple!). In addition to washing with castile soap, I also exfoliate almost everyday during the summer. Part of the reason my skin used to break out so much was because it does not shed the dead layers off like it's supposed to. This is a pretty common problem I found out. So, my quick and practically free solution - Baking Soda! Seriously.
I always have baking soda around the house, we cook with it, clean with it, and now shower with it. It's mildly abrasive, but has been gentle enough on my face, and let me tell you, my skin has started looking amazing!
I just shake a small amount into the palm of my hand, mix with a bit of water, and then massage onto my face after cleaning it. It rinses right off, and you'll feel a difference immediately. This really only costs pennies, and you don't have to worry about chemicals, additives, or anything of that nature because you're just using that one ingredient.
I hope someone finds this helpful. Please let me know by leaving a comment.
Take care everyone!
~Lisa
A few weeks ago, I posted about my face cleaning routine (which is super simple!). In addition to washing with castile soap, I also exfoliate almost everyday during the summer. Part of the reason my skin used to break out so much was because it does not shed the dead layers off like it's supposed to. This is a pretty common problem I found out. So, my quick and practically free solution - Baking Soda! Seriously.
I always have baking soda around the house, we cook with it, clean with it, and now shower with it. It's mildly abrasive, but has been gentle enough on my face, and let me tell you, my skin has started looking amazing!
I just shake a small amount into the palm of my hand, mix with a bit of water, and then massage onto my face after cleaning it. It rinses right off, and you'll feel a difference immediately. This really only costs pennies, and you don't have to worry about chemicals, additives, or anything of that nature because you're just using that one ingredient.
I hope someone finds this helpful. Please let me know by leaving a comment.
Take care everyone!
~Lisa
Thursday, July 15
Colorful Sand Art
Welcome Back!
Today I'm sharing a much over-due kid's craft project. We had a lot of fun with this one, and ended up using it as a center piece on our kitchen table. I hope you enjoy it!
What you need:
Sand (we stole some from our sandbox - I don't think the kids will mind)
Zip closure bags
Food coloring
Funnel or small cups, or both
Toothpick (optional)
1) Put 1-2 cups of sand in a baggie. We did four different colors, so therefor filled up four different bags.
 3) Pour the sand in alternating colors, layering them on top of each other, in any way your child wants. If they're old enough, have them do the layering - as well as the shaking above.

4) Here's a shot of our halfway threw. My son asked me to give it teeth, so the only thing I could think of was to stick the toothpick in along the side of the glass to push some of the color down. He seemed pretty happy with that solution. You can see it in the next photo.

5) We then filled it almost to the top with more layers.

6) We found some fake flowers laying around and pushed them in the middle, and now we have a cute little center piece for our table.

Today I'm sharing a much over-due kid's craft project. We had a lot of fun with this one, and ended up using it as a center piece on our kitchen table. I hope you enjoy it!
What you need:
Sand (we stole some from our sandbox - I don't think the kids will mind)
Zip closure bags
Food coloring
Funnel or small cups, or both
Toothpick (optional)
1) Put 1-2 cups of sand in a baggie. We did four different colors, so therefor filled up four different bags.
 2) Put 4-8 drops of food coloring into each bag and close. Make sure the bag's are completely closed, or you'll have quite the mess on your hands. Shake each bag vigorously until the color is well blended and you don't see any food coloring clumps. The should look like the photo below.
 3) Pour the sand in alternating colors, layering them on top of each other, in any way your child wants. If they're old enough, have them do the layering - as well as the shaking above.

4) Here's a shot of our halfway threw. My son asked me to give it teeth, so the only thing I could think of was to stick the toothpick in along the side of the glass to push some of the color down. He seemed pretty happy with that solution. You can see it in the next photo.

5) We then filled it almost to the top with more layers.

6) We found some fake flowers laying around and pushed them in the middle, and now we have a cute little center piece for our table.

Thanks for visiting my blog, and please leave a comment and let me know what you think about the site. Is there something you'd like to see more of? Or less of?
Take care everyone!
~Lisa :)
Wednesday, July 14
DIY leather and bead necklace
Hi Everyone!
I'm really excited to share this post with you! One of my favorite things to do when flipping threw magazines is to ask myself if I could make whatever I'm looking at. A lot of times the answer is yes, but for the price tag, it's not worth the time and effort. The last one I came across however completely was. I found this necklace in the August edition of Rachel Ray Magazine, in the Everyday Faves Style section. The necklace they feature is $128! Really?? For a strand of leather and three beads??? It's super cute and will pair well with a white T-Shirt (ignore my outfit in the finished photo - because it really doesn't go with that!) I went out and bought all of my supplies for this, which came to less than $4 dollars - and I could make at least 4 more without spending another dime! So here goes....
What you need:
`Leather string (found in the jewelry section of craft stores)
`Beads of your choice (1 large & 2 small) - make sure the holes in the beads are large enough to fit the leather string
`Scissors
1) Collect your supplies.
 3) Tie a knot (looping both ends around your finger and then inside each other) at the top of the large bead, making sure that your end pieces are similar in length. Try and get the knot as close to the bead as possible.
 4) Measure where you would like the necklace to fall on you, and then keep your finger in that spot when you remove it. This is where you will make your next knot (again, looping them both around and then threw).

5). Lay the bead down and line up the knots. Place a finger where you want to tie the next knot. Make sure there will be enough room to slide the large bead threw the gap. Then tie your second knot in the same fashion as before.
 5) Here is an example of what it should look like:
 6) String each small bead onto the ends of the necklace and decide how far down you want them to dangle. Then tie a knot under each bead to secure it in place. Make sure to pull the knots as tight as you can to make sure they won't come undone.

7) Trim your ends and you're done!

That's it! I love it! It only took about 10 minutes start to finish, and saved me $124 dollars (not that I would ever spend that amount on fashion jewelry, but still). Again, I think this will look great with a white tank or Tee - not what I'm wearing in this photo :)

I'm really excited to share this post with you! One of my favorite things to do when flipping threw magazines is to ask myself if I could make whatever I'm looking at. A lot of times the answer is yes, but for the price tag, it's not worth the time and effort. The last one I came across however completely was. I found this necklace in the August edition of Rachel Ray Magazine, in the Everyday Faves Style section. The necklace they feature is $128! Really?? For a strand of leather and three beads??? It's super cute and will pair well with a white T-Shirt (ignore my outfit in the finished photo - because it really doesn't go with that!) I went out and bought all of my supplies for this, which came to less than $4 dollars - and I could make at least 4 more without spending another dime! So here goes....
What you need:
`Leather string (found in the jewelry section of craft stores)
`Beads of your choice (1 large & 2 small) - make sure the holes in the beads are large enough to fit the leather string
`Scissors
1) Collect your supplies.

2). Cut the sting to the length you'll desire. You will have to fold the string in half and then measure. Be sure to add about and extra inch or two for trimming at the end. String your large bead, and let fall to the bottom center.
 3) Tie a knot (looping both ends around your finger and then inside each other) at the top of the large bead, making sure that your end pieces are similar in length. Try and get the knot as close to the bead as possible.
 4) Measure where you would like the necklace to fall on you, and then keep your finger in that spot when you remove it. This is where you will make your next knot (again, looping them both around and then threw).

5). Lay the bead down and line up the knots. Place a finger where you want to tie the next knot. Make sure there will be enough room to slide the large bead threw the gap. Then tie your second knot in the same fashion as before.
 5) Here is an example of what it should look like:
 6) String each small bead onto the ends of the necklace and decide how far down you want them to dangle. Then tie a knot under each bead to secure it in place. Make sure to pull the knots as tight as you can to make sure they won't come undone.

7) Trim your ends and you're done!

That's it! I love it! It only took about 10 minutes start to finish, and saved me $124 dollars (not that I would ever spend that amount on fashion jewelry, but still). Again, I think this will look great with a white tank or Tee - not what I'm wearing in this photo :)

Sunday, July 11
Homemade Soft Tortilla Shells

Welcome Back!
I wanted to write about one more recipe before returning to more creative posts (I have lot's to share in that department!). This is one of our favorites. It's really simple. In fact, had I known earlier just how simple these were to make, I would have started this years ago. For less than a dollar you get 8 - 10 large soft shells. We use these for tacos, sandwich wraps, banana roll-ups, and even to make our own tortilla chips. Click here for the original recipe.
What you need:
3 C Whole Wheat Flour
1 C Water
1/4 C Melted Coconut Oil (or preferred cooking oil, such as olive)
1/4 tsp Baking powder
1 tsp Salt
1) Combine dry ingredients, then add the wet and mix until it forms a slightly sticky dough.
2) Mold into 8 - 10 balls and let sit for 10 minutes.
3. On a floured surface, roll out into tortilla shape and grill on a warm skillet for 1-2 minutes on each side, or until done. Be careful not to let them get brown, or they won't be as pliable.
I like to double up this recipe and freeze half.
Take care everyone!
~Lisa
Friday, July 9
Balsamic Dressing
Welcome Back!
I absolutely LOVE Panera Bread's fresh mozzarella and tomato basil salad - especially the balsamic dressing that they use. I've looked for similar dressing's in the store, and nothing comes close. Then I tried this recipe, and it's it! It tastes just like the one I love so much, and at a fraction of the price. Combine this with my own fresh mozzarella and tomato's and basil from my garden and I'm in heaven. Now I just need to find the recipe for Panera's rosemary focassia bread....
What you need:
2 Tbsp balsamic vinegar
1 Tbsp red wine vinegar
1 Tbsp Dijon mustard
1 tsp brown sugar
1 garlic clove
1/2 tsp salt
1/4 tsp black pepper
1/4 C olive oil
1) Mix everything but the oil, and then add the oil at the end, whisking briskly until blended well.
I absolutely LOVE Panera Bread's fresh mozzarella and tomato basil salad - especially the balsamic dressing that they use. I've looked for similar dressing's in the store, and nothing comes close. Then I tried this recipe, and it's it! It tastes just like the one I love so much, and at a fraction of the price. Combine this with my own fresh mozzarella and tomato's and basil from my garden and I'm in heaven. Now I just need to find the recipe for Panera's rosemary focassia bread....
What you need:
2 Tbsp balsamic vinegar
1 Tbsp red wine vinegar
1 Tbsp Dijon mustard
1 tsp brown sugar
1 garlic clove
1/2 tsp salt
1/4 tsp black pepper
1/4 C olive oil
1) Mix everything but the oil, and then add the oil at the end, whisking briskly until blended well.
Thursday, July 8
Homemade Pizza Sauce
Welcome Back!
A few weeks ago, I posted our pizza dough recipe. So I figured you would probably need some sauce to put on it. This is our all time favorite pizza sauce! Try it and let me know what you think.
What you need:
1 can tomato paste (6 oz)
6 oz warm water (just fill up the empty can)
3 tbsp grated parmesan cheese
1 tsp minced garlic
1 tbsp honey
1 tsp anchovy paste (adds lots of Vitamin D)
3/4 tsp onion powder
1/4 tsp dried oregano
1/4 tsp dried marjoram
1/4 tsp dried basil
1/4 tsp black pepper
1/8 tsp cayenne pepper
1/8 tsp salt
1) Mix together tomato paste and water until it has a smooth consistency, then add everything else.
2) Cover and let sit in the refrigerator for at least an hour to let the flavors blend.
This will provide enough sauce for up to two large pizza's depending on how much you use. I like to double the recipe and freeze pre-portioned sizes to go with our frozen dough.
A few weeks ago, I posted our pizza dough recipe. So I figured you would probably need some sauce to put on it. This is our all time favorite pizza sauce! Try it and let me know what you think.
What you need:
1 can tomato paste (6 oz)
6 oz warm water (just fill up the empty can)
3 tbsp grated parmesan cheese
1 tsp minced garlic
1 tbsp honey
1 tsp anchovy paste (adds lots of Vitamin D)
3/4 tsp onion powder
1/4 tsp dried oregano
1/4 tsp dried marjoram
1/4 tsp dried basil
1/4 tsp black pepper
1/8 tsp cayenne pepper
1/8 tsp salt
1) Mix together tomato paste and water until it has a smooth consistency, then add everything else.
2) Cover and let sit in the refrigerator for at least an hour to let the flavors blend.
This will provide enough sauce for up to two large pizza's depending on how much you use. I like to double the recipe and freeze pre-portioned sizes to go with our frozen dough.
Wednesday, July 7
Blueberry Coffee Cake
 Welcome Back!
I've decided that for the rest of this week, I'm going to post some of our favorite recipes. If you know me off-line, then you already know I'm a bit of a natural food freak ;) I've tried tons and tons of recipes over time with my family and came up with a little system that has served us well. Each time I try something new, if three out of the four of us like it, it makes it into my recipe box. So every recipe on this blog is straight from my box. Enjoy!
Blueberry Coffee Cake
What you need:
2 C Flour (I use stone ground whole wheat)
1 C Sugar (I use raw cane sugar - or sucanant if I have it)
3/4 C Softened butter - preferably from grass-fed cows, the flavor makes a HUGE difference
2 tsp baking powder
1/2 tsp baking soda
1 egg (farm fresh) beaten in a liquid measure cup, then fill to
1 C buttermilk
1) Mix sugar, flour and butter until it resembles corn meal.
2) Set aside 1 & 1/4 cup for topping
3) Mix baking powder and soda into the original dry ingredients in large bowl
4) Lightly beat an egg in a liquid measuring cup, then fill the rest of the cup with buttermilk until it reaches the one cup mark. Pour this into large bowl.
5) Mix well and then spread into a greased 9x9 or 9x13 pan.
6) Spread a layer of blueberries
7) Squeeze small handfuls of the dry mix from earlier and drop in small chunks on top of the blueberries.
Bake on the top shelf at 375 degrees for 35-45 minutes.
We like to serve this cold, right out of the fridge after baking.
This is a modified recipe from one I found online here.
Tuesday, July 6
Upcycle Baby Blanket into a Floor Pillow
 Welcome Back!
I hope everyone had a great 4th of July weekend (for those of us in the states) - we sure did :) I made this pillow on the 3rd and brought it with for the fireworks for my little one. She loves it! I found the idea for this in the back of a recent issue of Parent's Magazine. This took about 30 minutes start to finish.
What you need:
A double sided (meaning 2 separate pieces of fabric sewn together) baby blanket
Scissors
Fiber Fill
Thread that matches existing stitching
Needle
1. Snip open a four inch section near the seam of the blanket. I chose to do mine by the tag, near the corner so it wouldn't be too noticeable and so I could remove the tag.
2. Stuff the blanket to desired thickness with fiber fill. You can buy fiber fill at any craft store. I purchased a 5 pound box because I wasn't sure how much I would need. I used up a little over half the box. I wish I could say that I bought it with a 50% off coupon that are always available at those stores, but it was a last minute rushed idea so the box ended up costing about $14. But now I have lots left over for other projects too.
3. Once full, sew up the slit with matching thread, and that's it! You now have a super soft and super comfy floor pillow for your little one.
Have a great day and please come back soon!
Wednesday, June 30
Homemade Taco Seasoning
Welcome Back!
Today I wanted to share my homemade taco seasoning recipe with everyone. The store bought versions contain starches, citric acid, maltodextrin, and a bunch of other unnecessary junk. This recipe is the best I've found so far and it tastes amazing - so much better than the pre-made mixes. You can quadruple the recipe and store it in an air tight container for future use. We use about 2 tablespoons per pound of meat.
What you need:
2 Tbsp Chili Powder
1/2 tsp Garlic Powder
1/2 tsp Onion Powder
1/8 tsp Cayenne Pepper
1/2 tsp Oregano
1 tsp paprika
3 tsp Ground Cumin
2 tsp Sea Salt
2 tsp Black Pepper
1.) Combine all ingredients with a whisk and store in an air tight container.
That's it!
Today I wanted to share my homemade taco seasoning recipe with everyone. The store bought versions contain starches, citric acid, maltodextrin, and a bunch of other unnecessary junk. This recipe is the best I've found so far and it tastes amazing - so much better than the pre-made mixes. You can quadruple the recipe and store it in an air tight container for future use. We use about 2 tablespoons per pound of meat.
What you need:
2 Tbsp Chili Powder
1/2 tsp Garlic Powder
1/2 tsp Onion Powder
1/8 tsp Cayenne Pepper
1/2 tsp Oregano
1 tsp paprika
3 tsp Ground Cumin
2 tsp Sea Salt
2 tsp Black Pepper
1.) Combine all ingredients with a whisk and store in an air tight container.
That's it!
Tuesday, June 29
DIY No Sew Tutu
 Welcome Back! Or shall I say "I'm Back!"
At least for a bit anyway, lol. I wanted to share this super easy and adorable project - it took about 30 minutes start to finish, and ended up sooo cute! My daughter absolutely loves this.
Here's the link to the tutorial I followed to make this tutu.
To get this Forth of July design, I used blue satin ribbon and the color rotation went: 4 white, 4 red, 4 white, 4 blue, repeat....I'm pairing this tutu with white legging shorts, red sparkle mary janes from Target, a white tank embellished with homemade boutique bows, and a matching hair bow. Oh, and this is for my 2 year old, not me, lol.
Wednesday, May 26
Homemade Pizza Dough
 Welcome Back!
Pizza dough is one of the easiest yeast breads to prepare, and is a great starting point for beginners. I use this recipe to make our pizza's as well as bread sticks. I usually make four batches at once, and freeze the leftover three. If you do this, make sure to open the container or bag that the frozen dough is in while it's thawing, otherwise it might burst (I know this from personal experience). I also soak the wheat flour overnight in an acid medium to help break down the phytates. Doing this creates a soft dough similar to using white flour, and helps aid in digestion - allowing more vitamins and minerals to be absorbed into the body. I do a separate post on soaking soon.
What you need:
1 Pkg active dry yeast (2.5 tsp)
1 C warm water (110-115 degrees - should feel slightly warm to the touch, but not hot)
2 C Flour (I use a mixture of whole wheat and spelt) + up to 2/3 C
2 Tbsp Olive Oil
1 Tsp Salt
2 Tsp Sugar
1. Dissolve yeast in warm water for 10 minutes, or until it gets super bubbly and frothy (this is called proofing)
2. Combine all ingredients and knead until the dough is very elastic, not stiff. You will probably need to add a bit more flour while kneading - you want the dough to be tacky, but not so sticky that it won't come off your hand.
3. Place dough in an oiled bowl, cover with a towel and put in a warm place. Let rise for 30 minutes, or until doubled in size.
4. Roll out to desired shape and size, and cook at 350 degrees for 20 minutes or until slightly browned.
Tuesday, May 25
Searching For Clovers
 Welcome Back!
Today was absolutely beautiful out, and the inside of the house was not the place to be. We spent the majority of the day outside playing, and ended the great day with a walk near dusk. Our mission? To find the infamous four leafed clover... We never found one, but the kids had a great time in the process. We came across an ant colony, touched the different textures of grass, had a few bird sightings and counted the sidewalk blocks. This is a great exploring activity and serves as a good opportunity to teach your kids about nature.
What you need:
comfy shoes
1. Decide what it is you'd like to go on a search for. Some examples would include our clover idea, or maybe a robin's egg, colored rocks, and so on.
2. Point out different things that you see around you, the smells, the sounds. Ask your children to do the same for you - you'd be amazed at some of the things those tiny eyes catch that you would otherwise never notice.
That's it really, just make sure to have a good chunk of time set aside to do this - everything is amazing to a young mind and you don't want to have to rush them along.
Take care everyone!
~Lisa
Wednesday, May 19
Cardboard Fun! Uses for packaging inserts
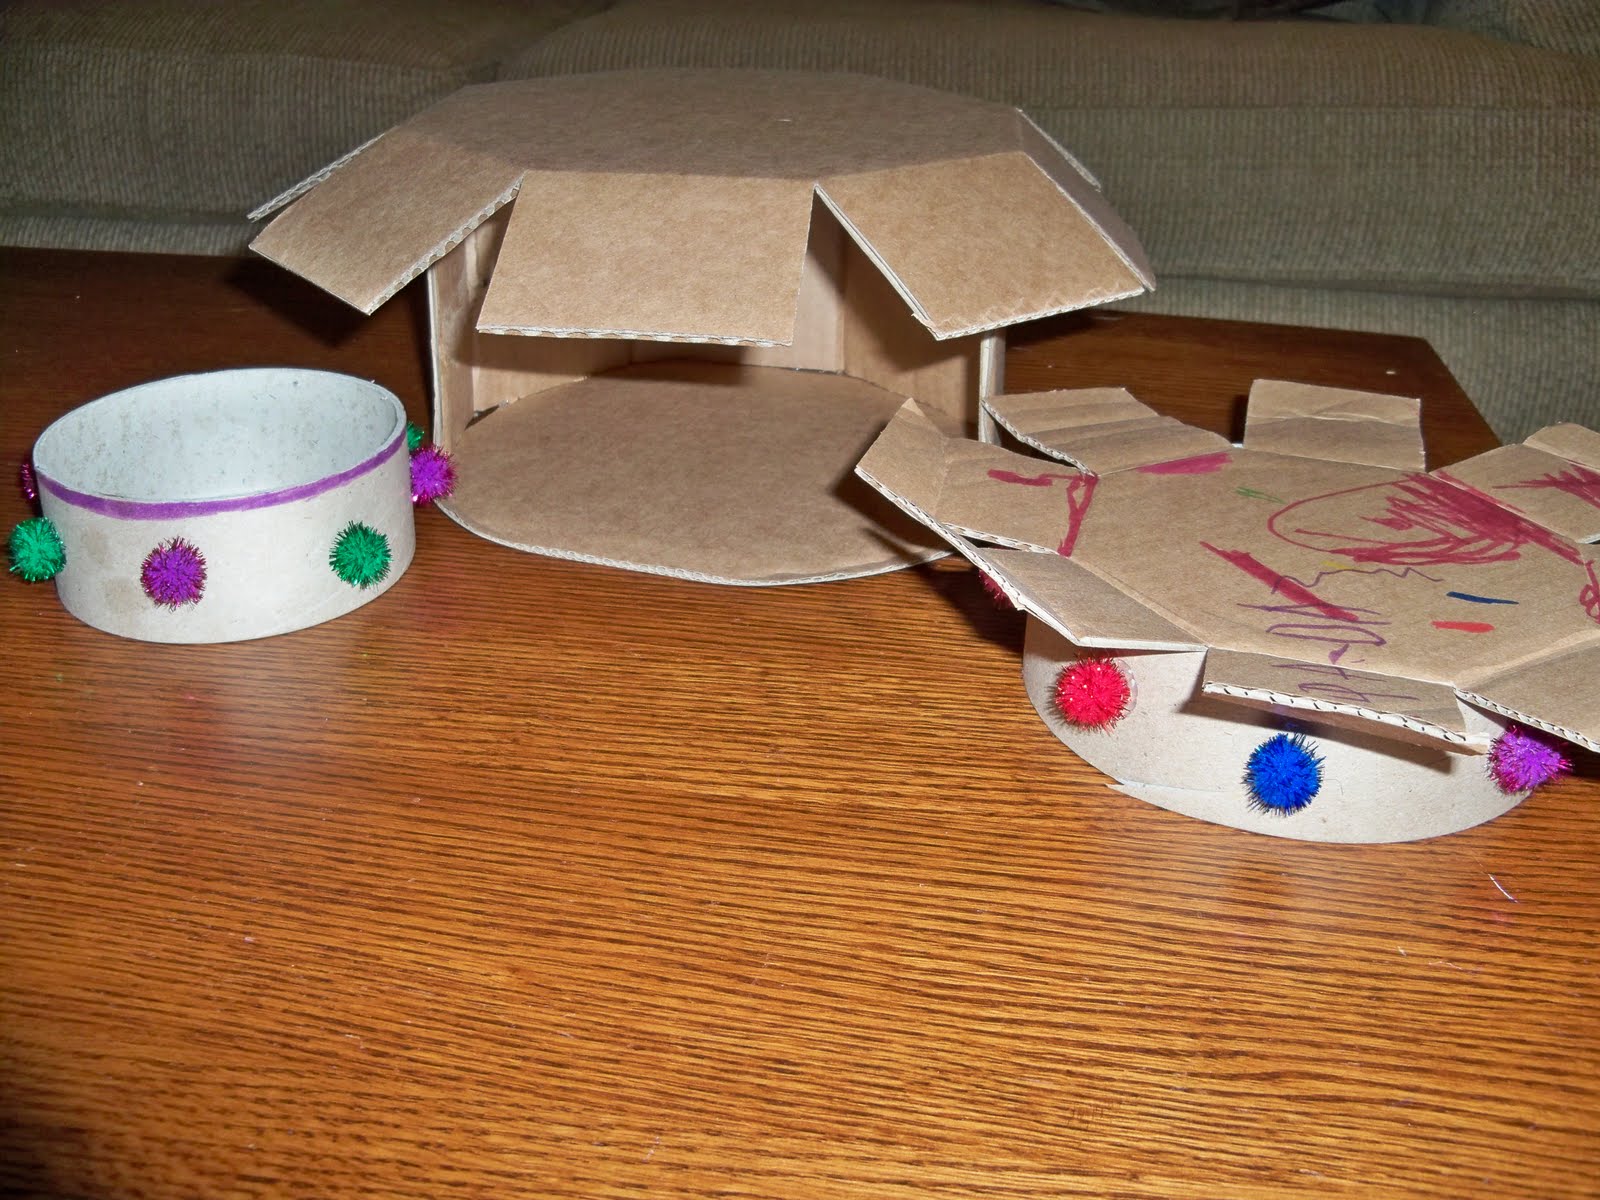 We recently purchased a new set of stainless steal pots and pans to replace our old non-stick set. There are health and environmental reasons behind the switch that I'll delve into deeper at another time. For now, I just wanted to share the fun my children had creating new things out of what would have otherwise ended up in the recycle bin.
What You Need:
Cardboard packaging inserts
Glue
Embellishments
Markers
In the photo above, the children created a bangle bracelet, and home/hut for transformers, and a princess crown. My son refuses to let these go, and we did this project well over a month ago. I was surprised with what they came up with, and everyone had a great time.
Have you re-purposed anything lately? Share with us in the comments box below!
Tuesday, May 18
Homemade Laundry Detergent - Biodegradeable & Chemical Free
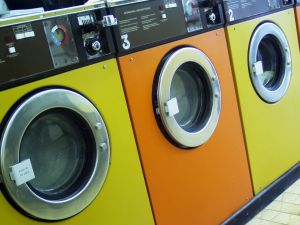
I'm used to getting funny looks when I talk about some of the things I make myself, with one exception - laundry detergent. The minute I mention it costs me a little more than $3 to wash 64 loads, everyone asks how I do it. So, I figured it was time to post the recipe online to give my hands a break from writing it out ;)
An added bonus, and the main reason I went searching for this recipe is that it's completely biodegradable, and free from harsh detergents, soaps and dyes. So not only does this wonder soap cost considerably less than store bought jugs, it's safer for my family's skin, safer for our water supply, easier on the machines, and produces less waste for the environment. A win-win in my eyes. It is important to note however that this soap is not like traditional detergents, and it requires a little shake before pouring it into the measuring cup.
What you need:
1C Castile Soap (I use dr. bronner's sal suds - you can buy it here)
2C water
1/3C Salt
1C Baking Soda
Vinegar
1. Warm the salt and baking soda in water until it will no longer dissolve (you will have quite a bit of extra baking soda that does not dissolve and this is why it needs to be slightly shaken prior to measuring out for the laundry).
2. Transfer this to a clean gallon container, add the soap and then fill the rest with water.
3. Use 1/4C per load unless super dirty. For heavily soiled clothing use 1/2C. Add 2 tbsp of vinegar to the rinse cycle. This acts as a fabric softener and disinfectant.
Click here for the original recipe.
If you have any questions or suggestions, please leave a comment.
Happy cleaning!
Sunday, May 16
Pipe Cleaner Flower Pots

This is a great Spring project, and doubles as a gift your children can give to relatives for holidays and birthdays.
What you need:
Pipe cleaners - assorted colors
Pony beads
Dry beans
Dixie cups
Small Styrofoam balls (1 for each "pot")
Paint - we chose green and brown to be realistic, but get creative here!
Craft Glue or Glue gun
1. Paint the Dixie cups and Styrofoam balls and allow to dry.
2. Once dry, fill each Dixie cup with about a half inch of beans - give or take so that your painted ball will still rest nicely inside the Dixie cup.
3. Glue the ball to the Dixie cup by applying glue along the inner edges of the Dixie cup where both objects will touch. This secures the beans.
4. Take one pony bead and one pipe cleaner, loop the pipe cleaner threw the pony bead to create the petals. Expect to ruin at least one pipe cleaner while you get the hang of this - I tried doing this in a bit of a rush, big mistake! :) Allow a bit of pipe cleaner to extend from the loops so that you can attach it to the stem.
5. Create stems by folding a green pip cleaner in half and cutting at that fold (1 pipe cleaner will give you two identical stems).
6. Twist together the flower and stem, and then push the bottom of the flower into the pot.
That's it!
This was a fun project for us, and I think it turned out pretty cute.
Be sure to check back often - I'll be updating the site and adding new posts more frequently.
Did you try this one? Let me know, leave a comment :)
Tuesday, April 27
Dr. Bronner's Castile Soap - Face Wash

For years, as long as I can remember actually, I've had problem skin. When I was younger, we couldn't afford a dermatologist, and now, as an adult, I wanted to avoid one because I knew the "solution" would be in a pill. I prefer to take a more natural approach when it comes to my body. With that being said, I am sooo excited to share this with all of you!
As a last ditch effort I decided to give a pure castile soap a try in hopes it would clear up my sensitive acne prone skin. I had tried every product imaginable from drug stores and department stores, as well as proactive (don't even get me started on that one - ugh!). Nothing worked. I told myself if this last method didn't work, then it was time to make a dermatologist appointment. Oh my gosh am I glad I gave this a try! It's super simple, costs hardly anything and my skin has not been this clear since I was a child.
All I do is mix a small bottle with a 50% castile soap solution and 50% filtered water. I put 2-3 drops in my hand and rub my hands together quickly to form a good lather. I wash my face twice a day this way, and after a month, I am pimple-free. That's it, seriously! Now that my skin is adapting to this method, it has dry days, and I use a handmade face cream (more on that later!).
I use Dr. Bronner's Castile Soap, the mild baby formula. You can buy it online here or go to your local Vitamin Shoppe.
I love that this works because I also use Dr. Bronner's to make my own laundry detergent (for less than $4 for 64 washes), homemade body wash (I actually use the same solution I use for my face, and have since needed far less body lotion), baby wash, dishwasher detergent, and dog shampoo. I'm sure I'll find plenty of other uses for it in the future, and I'll be sure to share.
And, an even better bonus to Dr. Bronner's is that it's completely natural, and biodegradable. I won't harm our water system, or our skin and is produced in a fair way. Because it is free from harsh detergents, it doesn't wreak havoc on my skin (sodium laurel sulfate is a major skin irritant for me).
Let me know if you have questions by leaving a comment below. I'm always happy help!
As a last ditch effort I decided to give a pure castile soap a try in hopes it would clear up my sensitive acne prone skin. I had tried every product imaginable from drug stores and department stores, as well as proactive (don't even get me started on that one - ugh!). Nothing worked. I told myself if this last method didn't work, then it was time to make a dermatologist appointment. Oh my gosh am I glad I gave this a try! It's super simple, costs hardly anything and my skin has not been this clear since I was a child.
All I do is mix a small bottle with a 50% castile soap solution and 50% filtered water. I put 2-3 drops in my hand and rub my hands together quickly to form a good lather. I wash my face twice a day this way, and after a month, I am pimple-free. That's it, seriously! Now that my skin is adapting to this method, it has dry days, and I use a handmade face cream (more on that later!).
I use Dr. Bronner's Castile Soap, the mild baby formula. You can buy it online here or go to your local Vitamin Shoppe.
I love that this works because I also use Dr. Bronner's to make my own laundry detergent (for less than $4 for 64 washes), homemade body wash (I actually use the same solution I use for my face, and have since needed far less body lotion), baby wash, dishwasher detergent, and dog shampoo. I'm sure I'll find plenty of other uses for it in the future, and I'll be sure to share.
And, an even better bonus to Dr. Bronner's is that it's completely natural, and biodegradable. I won't harm our water system, or our skin and is produced in a fair way. Because it is free from harsh detergents, it doesn't wreak havoc on my skin (sodium laurel sulfate is a major skin irritant for me).
Let me know if you have questions by leaving a comment below. I'm always happy help!
Monday, April 26
Homemade Buttermilk Ranch Dressing
I brought this dressing to work with me, and everyone raved over it and has been asking for the recipe. This is sooo good, and healthy too!
1 C Cultured Buttermilk
2/3 C Mayo
2/3 C Plain Yogurt
1 tsp Garlic Powder
1 tsp Onion Powder
2 tsp Chopped Chives (or dried)
2 tsp Chopped Dill (or dried)
1 tsp Salt
1/4 tsp Pepper
Combine all of the ingredients in a medium bowl and whisk together quickly until evenly mixed. Refrigerate for 30 minutes prior to serving. This will last as long as the expiration date on your buttermilk.
Enjoy!
1 C Cultured Buttermilk
2/3 C Mayo
2/3 C Plain Yogurt
1 tsp Garlic Powder
1 tsp Onion Powder
2 tsp Chopped Chives (or dried)
2 tsp Chopped Dill (or dried)
1 tsp Salt
1/4 tsp Pepper
Combine all of the ingredients in a medium bowl and whisk together quickly until evenly mixed. Refrigerate for 30 minutes prior to serving. This will last as long as the expiration date on your buttermilk.
Enjoy!
Monday, April 5
Grow Your Own Seedlings
 **This a post from my other blog - Clearing Out The Stuff, that I felt could be carried over to this site as well**

This was a huge step for me! If you know me personally, then you probably know just how un-green my thumb really is. I have never been able to keep a plant alive - even the easy ones. This is a difficult area for me, and I know it's silly - so I'm trying super hard :)
As a fun project, my 5 year old son Austin and I decided to try and grow our own seedlings using an inexpensive greenhouse kit (to a more experienced gardener I'm sure this seems wastefull - but I've never done this before, and I wanted my son to see something, lol). This was so easy, we just poured water over the soil packets to make them expand, planted 2-3 seeds in each soil packet, and covered it with the lid - I didn't even have to water it the first week because it stayed so moist.
It's hard to tell from the photo, but everything sprouted, and quickly at that. This photo was taken 1 week after we planted everything. We have six different varieties, and 12 of each, leaving us with 72 plants, and no where to put them, lol. That issue led to me to container gardening and garden beds - but more on those later! We are three weeks out, and so far everything is thriving. It's my hope to have a bunch of fresh veggies this summer for my family. Knowing where my food is coming from, and the soil it's grown in is important to me - not to mention it will save us a lot of money over time if I freeze (or, imagine, learn how to can/preserve!) the food.
Subscribe to:
Posts (Atom)