Sunday, February 28

Easy Wall Art


Welcome Back!
This was a fun project for my son. He's fascinated with reptiles, so we flipped threw some National Geographic magazines (super old ones, lol), and tore out the pictures he liked best.
The frames were in packs of two from the dollar store, and were unfinished.
What you need:
Photos or Magazine pictures cut to the size needed to fit the frame
Lightweight unfinished frames
Acrylic Paint
Paint brushes
1) Paint your frames in the desired color (Austin's room is based around the primary colors, so we plan on hanging these on the blue wall to follow the theme). Gather your photos or cut out the magazine pictures while the frames dry.
2) Insert the photos and you're done!
I hope you enjoyed this one!
Come back soon for more projects for you and your children.
Take care,
Lisa :)

Saturday, February 27

Sensory "Table"

Welcome Back!


Or maybe I should say "I'm Back!!"


I've been very distracted over the last few weeks, and have jumped into a bunch of projects (I'll post more on that later ;)


So I'd like to jump right back into this one. I will be doing my best to post at least 2-3 new projects each week. I actually started a new blog that focuses on simplifying, gaining health, and living in more sustainable lifestyle. If you'd like to take a peek click here.


Now onto the project....


What you need:

Large plastic storage container w/lid (I used an under the bed version that I already had)

3-4 large bags of uncooked rice (I found these for $1 a piece at the supermarket)

Any extra kitchen "tools" and toys you have - we used measuring cups, Popsicle sticks, funnels, foam pieces and old die-cast trains.


1) Empty all of the bags of uncooked rice into the storage bin and add your "tools" and toys - that's it!


My children will spend a good 30-40 minutes playing in the rice. They pour it from funnels and cups, and make birthday cakes with measuring cups and Popsicle sticks. They like making designs in the rice with their fingers and pushing the die cast cars and trains around in it. I have to stay close by my little one to make sure she doesn't throw the rice all over the place.


Make sure that you close up the rice to avoid small pests.


Thanks for visiting my site and please come back soon! I will be adding a few projects each week.


Take care!

-Lisa :)

Tuesday, February 9

King Cake - Fat Tuesday

Hi Everyone!
We're making a king cake tonight to celebrate fat tuesday. Here's a super simple way to make this complicated cake.
Buy pre-made cinnamon roll dough with frosting. Take out all of the roll segments and shape them into snake like shapes then attach them together to form a circle. Bake according to directions on the package. While that's baking, separate 3 piles of sugar and place in small bowls. Use food coloring to dye the sugar (I used 3 drops per bowl with about 1/4 cup of sugar in each one - traditional colors are purple, green and yellow ( we didn't have yellow, lol). When the cake is done, frost then add the colored sugar in three segments. You can also include a trinket before baking (plastic baby, bean, and so on) - we won't because my children are still too little.
I'll post a pic tonight.
Happy baking!
Lisa

Saturday, February 6

Fuzzy Felt Spider


Welcome Back!

Everyone is finely feeling better in our house, thank goodness! We got back to our crafts this afternoon, but the last few days got me thinking. I'm changing the dynamics of this blog. I still intend to do a craft everyday with my children, but I won't be posting daily - it's just too much right now. I'm limiting my blogging to 2-3 days a week - so you'll still get plenty of crafty ideas :)

My son's 5th birthday is next weekend, and a friend of mine gave him a craft DVD that was completly geared toward his age - I love it! The DVD gives you a few different crafts to complete, and then goes on to tell a story involving the character's your child just created. Thank you Mar! This spider was one of the crafts in the video.

What you need:
2 Sheets of felt in different colors
4 pipe cleaners
Scissors
Fabric Glue
Tape

1) Cut out 1 large circle, 2 smaller ovals for the eyeballs, and 2 tiny circles for the pupils.

2) Glue together the eyeball pieces to create finished eye, and then glue those to the large circle to create your spider base.

3) Hold the 4 pipe cleaners together in your hand so that they are even, and then twist from the ceneter to secure them, you can also take one end and wrap it around the center and then pull it back over to line up the legs. About an inch and a half from each grouped end (4 ends in a group) hold your hand straight, and bend the legs down, then do the same to the tips of that section, but pull them up a bit. Repeat on the other side. Now it should look like cartoon spider legs with feet.

4) Attach the legs to the back of the spider face with tape, and then you're done!

That's it!

My son had a great time making his spider climb the walls of our house this afternoon.

Thanks for visiting, please come back often!
-Lisa

Thursday, February 4

Some Links

Welcome Back!

Everyone in our house is sick now, and none of us really want to do much, lol. If you're looking for some fun craft ideas for you and your children, here's a few links to some sites I enjoy. Hopefully we'll all be up and moving soon, and back on track with our projects.

Nick Jr. Games

Easy Child Crafts

Family Fun

Take care everyone!
-Lisa

Tuesday, February 2

Groundhog Day!

Welcome Back!

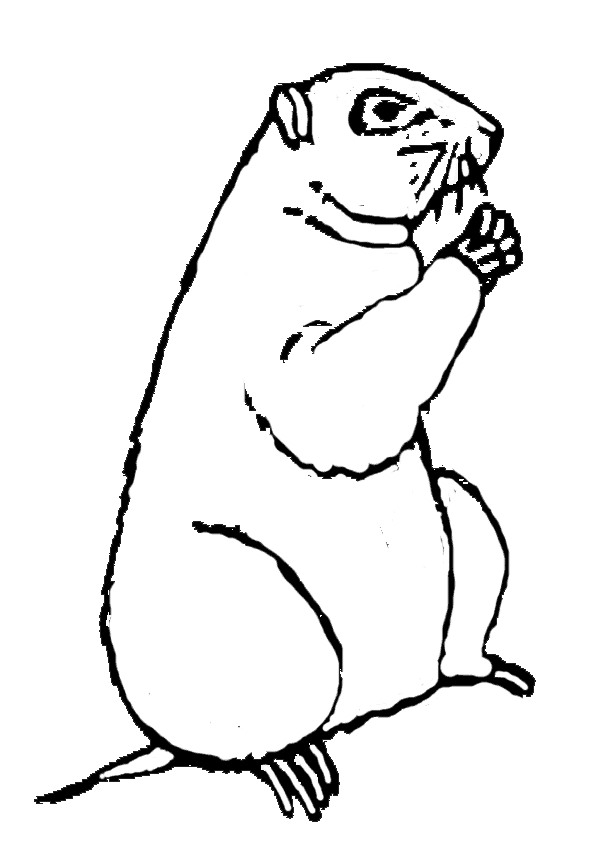
Well, both kids are still sick, and Austin had no desire to do much of anything today, so I went online to look for a cartoon groundhog for Hannah to scribble on. I found this, and it looks a lot like the one I did when I was little for the movie Groundhog's Day staring Bill Murray. It was filmed in the town we live in, and it's a huge deal over here, lol. Our little theater plays the movie for free the entire week, and people can take tours of the town's square where it was filmed and see the spot where Bill Murray tripped and fell into the street - seriously. So, that being said, I just couldn't let the day go by with out doing something festive :)

Please be sure to check back tomorrow - hopefully my little artist will be feeling better.
-Lisa

Monday, February 1

Make A Face


Welcome Back!

Austin is still a little under the weather, but he said he wanted to do a project, so we did this, and he had a great time. He thought making his own people, or aliens as he put it, was hilarious.

What you need:
Construstion paper for the base
Magazines
Scissors
Glue stick

1) Depending on your child's age, either cut out a bunch of body parts from the magazine, or have them do it.

2) Let your child glue the parts together however they want.

3) Talk about what you see in the finished image and what the new characters are doing.

That's it! This is so simple and inexpensive, and so far I'd have to say this was one of Austin's favorites.

Be sure to sign up for the daily emails so you don't miss a project.

Come back again soon!
-Lisa

Sunday, January 31

DIY Memory Board


Welcome Back!
It's a Momma Craft day!

I'm always looking for ways to use the odds and ends around my house, so I'm delighted that this turned out as well as it did. I didn't have to purchase a single thing to make this, and it's going to look great in Hannah's room! This picture really does not do it justice.

What you need:
Cardboard (or any sturdy solid lightweight piece - I used foam core, I've also heard of people using styrofoam)
Fabric large enough to cover the entire surface of the board and wrap to the back (I used one of Hannah's old baby blankets)
Various ribbons
Scissors
Glue Gun


1) Cut your board down to desired size (you can make these small for inside of lockers and attach magnetic tape to the back)

2) Using the hot glue gun, glue one entire side and let set. Pull the fabric taught, and glue the opposite end, repeat with the other sides so that the fabric is pulled and there are no wrinkles or bumps.

3) Glue on the ribbon strips in whatever fashion you'd like. I did one entire angled row, and then did the opposite angles so I could see where everything was going to intersect.

4) Find a few intersecting points, and glue them down, but don't do all of them, that way you can slip in different sized photos and momentos. I glued on iron on appliques to these spots to cover the glue and give it more personality.

That's it! If you used styrofoam, you can put nails in the wall, and then push the board into it. If it's a small locker board, attach some magnetic tape to the back. I don't plan on mounting mine to the wall, but instead resting it against the wall on top of her short but long dresser.

If you have any questions on this project or any others, just let me know by using the comment boxes.

Thanks for stopping by and be sure to visit often!
-Lisa

Saturday, January 30

DIY Straw Toppers


Welcome Back!

This is a fun, easy and inexpensive project that your children will love!

What you need:
Straws
Scissors
Small Printed images - (we did an image search on Google for one of Austin's favorite character's)
Hole punch

1. Find and print out your images - square and rectangle shapes seem to be easy, but get creative here

2. Cut out your images, leaving enough room along the top and bottome to put holes

3. Put a hole at the top and the bottom of each piece, and then insert the straw threw each hole starting at the bottom of the straw (you will probably have to squeeze the straw at the bottom to make it fit), and then push to the top.

That's it!

I hope you enjoyed this project!

-Lisa

Friday, January 29

Why Children Need Art Education

Welcome Back!

Everyone in our house is sick right now, and no one wants to do much but sleep :)

That being said, I thought it would be a good time to cover the art education topic. This is under a lot of debate right now, as more and more schools across the country are eliminating the arts in school in order to save money. This is a topic I feel very strongly about for a number of reasons, and was shocked when it sparked a debate between my husband and myself. He didn't feel it was an important part of the educational system "at least for little kids" to use his words exactly. So I started looking up information on the topic (becuase for some reason he can't take what I have to say about the subject as truth because I'm "too emotionally involved with it" to use his exact words again, lol).

Well, I came across this article and I think it does a great job of explaining exactly why children thrive from art education in grade school.

Here's a small portion from the National Arts Education Public Awareness Campaign talking about some of the benefits of art education in grade school:

(your child is) "4 times more likely to be recognized for academic achievement


3 times more likely to be elected to class office within their schools

4 times more likely to participate in a math and science fair

3 times more likely to win an award for school attendance"
 
Please visit the site for a more compelling list of reasons your child needs an art education: http://www.artsusa.org/public_awareness/

This is what my site is all about, and part of the reason I upload a new project each day. I hope that this can be used as a resource for many.

Would you like to share something on this topic? Please feel free to leave a comment below.

-Lisa

Thursday, January 28

ABC Valentine


Welcome Back!

This is a great way to practice begining reading skills with younger children. Just write someone's name vertically, and then horizontally next to each letter, find an adjective that describes that person. Austin and I had a great time coming up with words that describe his "Nana".

What you need:
Construction paper
Scissors
Marker
Any extras you'd like to use to decorate the heart

1. Fold the sheet of construction paper in half, and cut out half of a heart along the fold so that when you open it up, you'll have a symetrical heart.

2. Write the person's name vertically, then you and your child can think of adjectives for that person that start with the begining letter.

3. Decorate!

That's it, and I'm sure the recipient of this Valentine will absolutely love it :)

Thanks for stopping by! Please be sure to come back soon, I publish a new craft or art project every day.

-Lisa

Wednesday, January 27

DIY Wooden Bookmark


Welcome Back!

Sometimes when I'm flipping threw a magazine, I come across something that catches my eye because I have one of those "I could do that!" moments. That's where this project came from, and I thought it was a cute idea - the real ones sell for about $6 I think. This one set me back about $.82 with tax because I had everything else on hand. This project is definetly for older children, and would make for a really cute gift too.

What you need:
Stamp
Ink pad
Thin rectangular sheet of wood (I didn't do a thing to this piece execpt sand the edges)
Ultra-fine sand paper
Ultra-thin tip black pen/marker (I used Micron at 0.2 cm)
Markers

1. Sand away any rough edges.

2. Choose your stamp, and then stamp the image onto the wood lightly. Take your thin tip marker and outline anything you want to show up black.

3. Color in any areas you want to have color in with marker.

That's it! You can also free-form draw your image - I did that with the heart in mine. Don't be afraid to improvise, and be creative. If you're going to give one away as a gift, you could also write a poem or note on the other side.

Don't forget to sign up for a free daily email subscription to this blog so you don't miss a thing!

Let me know how yours turns out, leave me a comment :)

Have a great day everyone!
-Lisa

Tuesday, January 26

Primary Color Mixing


Welcome Back!

This is a great project for learning about color mixing, and how combining colors creates new colors. My son loved it, and kept singing that he was a "fantastic artist", lol.

What you need:
Acrylic Paint in Red, Blue and Yellow (the primary colors)
Paintbrush
Dixi cups or plate
Paper sheets
Water to clean the brush

1. Put each color of paint in a seperate cup or in seperate piles on a plate

2. Allow your child to mix and experiment with colors on the paper - explain what different colors are made by mixing.

Did you try this one? Let me know, I love to hear that our projects are being done! Don't forget to subscribe to my free daily emails so you don't miss a thing.

Thanks for stopping by!
-Lisa

Monday, January 25

Valentine Cones


Welcome Back!

Happy Monday everyone! This afternoon we put together these Valentine's Day cones to hold candy or treats. They are super simple to assemble.

What you need:
1 sheet of construction paper
2 pipe cleaners
Hole punch
Tape
Stickers, markers, paint, and/or glitter

1. Make a cone shape out of the construction paper by rolling it up at a diangle and taping it down to secure.

2. Trim any jagged edges at the top with the scissors, and puch two holes directly across from each other.

3. Twist together the pipe cleaners and then attach each end to each hole in the cone by looping and twisting it threw.

4. Have your child decorate however they please.

That's it!

Thank you so much for stopping by! Don't forget to subscribe to daily emails so you don't miss a thing!

Have a great day,
Lisa :)

Sunday, January 24

DIY Baby Pants


Welcome Back Everyone!

It's Sunday, which means it's a Momma Craft day! I love this one, but can not claim it as mine :) Not too long ago I stumbled upon a great site called makebabystuff.com that's filled with lots of fun ideas. One of them is a super simple, free project to make baby pants. I tried it out and was done in 30 minutes start to finish. You can try it out for yourself here.

I'm putting this up here for two reasons, one because I think it's a great find, and two, because I put my own spin on it. Instead of buying new fabric, I used an old pair of my husband's jeans and added my own details to make it girly for my daughter. For this example, I used one of Hannah's baby blankets (she never grew attached to them, but did fall in love with her raggy pig). I love some of the blankets she has, and I just can't bear to get rid of them. I had left over fabric from her blanket that I'll be turning into a heat/ice pack. Come back again for that project!

The picture at the top was one of Hannah's old blankets, I just finished this tonight and love it!

Thanks for stopping by!

Did you like this post? If so, please share it. And don't forget to subscribe to the daily emails so you don't miss a thing.

Have a great night!
-Lisa

Saturday, January 23

About Me


Welcome!
My name is Lisa. I am a wife, mother of 2, designer, personal trainer and waitress - whew! I have a B.F.A. in Design, and once my youngest starts school, I will be pursuing a Master's in Art Education for K-12.

When I first started this blog, my intentions were to provide other parents with art projects for their children. And while this is still true, it has also evolved into all sorts of art projects, green living, recipes, and much more.
Lately, I have found myself completely wrapped around creating something new with something old, worn out, or about to get thrown away. A lot of times, these are things around my house, and many times, these are thrifted items. I love thrift stores, garage sales, and craigslist - and a lot of my projects and inspiration come from these.
At some point (hopefully soon), I will be opening an etsy store to sell some of my projects, as well as patterns that I have designed.
Please look around, and ask questions if you have any. You can reach me directly at lisa_palubicki(at)yahoo(dot)com.
Thank you for visiting, and please come back soon!

Friday, January 22

Art Board


Welcome Back!

Today we made an art board for Austin to hang is favorite piece of the week on. We needed to find a way to clear out some of the overload of projects and papers we have, so he and I decided on this. He gets to pick one piece he wants displayed, and once he decides to put a different one up, the old one gets stored away. You can attach a piece of magnetic tape to the back to have it hang on the refridgerator.

What you need:
Foam core - any size (or a large piece of cardboard)
Glitter glue or paint
Crafting glue
Cloths pin

1. Cut down the foam core or cardboard to your desired size and shape, then have your child decorate it however they like.

2. Glue the clothes pin to the bottom of the board and allow to dry.

3. Attach magnetic tape to the back, and you're done!

Did you try this? Do you have another idea you would like to share? Leave a comment and let us know.

Be sure to sign up for our daily emails so you don't miss a thing!

Have a great night!
-Lisa

Thursday, January 21

Valentine's Day Napkin Holder


Welcome Back!

Welcome back everyone! We finished another Valentine's Day project today - it's quick, simple and inexpensive. This will add a festive touch to any table.

What you need:
Pipe cleaners in red, white and pink
A thick dowel rod (or something similar to wrap the braided pipe cleaners around)

1. Take three pipe cleaners (pink, white and red), and hold them together in your hand so that they are all even with each other, and twist one end tightly to hold them in place.

2. Braid the pipe cleaners together and then twist tightly at the end to secure the braid.

3. Wrap this around the dowel rod to get a good shape, and you're done!

That's it!

Did you enjoy this project? Let me know, leave a comment.

Don't forget to subscribe to the daily emails so that you won't miss a project - we do a new one every day.

Thanks for stopping by and come back soon!
-Lisa :)

Wednesday, January 20

Felt Finger Puppets


Welcome Back!

Austin has been on a huge reptile kick lately, so I wanted to try and incorporate that into a project. We decided to make him a snake felt puppet, and a monster with a mohawk for Hannah. I stuck to just felt for my daughter because she is only one - Austin's had a little more add ons.

What You Need:
Felt squares - any color depending on what you want to make
Needles and thread (or craft glue - I didn't want to wait for it to dry)
Scissors
Any add-ons you'd like - we used blue glitter glue for the snakes eyes
Black permanent marker - for details

1. Cut out a piece of felt for the body of the puppet (3.5 x2.5) and fold in half to sew two of the three edges together. If you want to give your puppet hair like hannah's, cut out a small piece of felt the same width as the folded felt, and as tall as you want for the length of hair. place inside of the folded felt and line up the edges so that it's tucked inside and you can not see it (this way when you turn it inside out, the hair will pop up. To make a mohawk, stitch along both the length (top) and one side of the height - the hair needs to be put in place before you sew the puppet together.

2. Turn inside out and you should have the body. Now decorate however your child pleases, and trim the hair half way down to give it a spiky look.

That's it! It took us about 10 minutes to make the puppets, and the kids had a great time with them.

Did you like this project? Be sure to subscribe to daily emails so you don't miss out on anything.

Please come back often, I'm always adding new projects.

Have a great day!
-Lisa

Tuesday, January 19

Valentine Cupcake Flower Card

Welcome Back!

I saw a picture of this project in the February edition of Better Homes and Gardens for this year and wanted to try it. I think it turned out pretty cute, and these can double for both a Valentine card, or a decoration.

What You Need:
2 Sheets of 8.5 x 11 Card Stock in any colors you wish
Paper cupcake liners (I used Valentine themed liners)
Scissors
Decorative edge scissors
Photographs of your children
Green felt
Craft Glue

1. Cut both sheets of card stock in half, then take the two sheets you want to use for the top layer and cut a decorative edge around it. You can do this by hand, or using specialized scissors. Glue together

2. Cut out a stem and leaf shapes and glue to the top sheet of paper.

3. Glue the back of a cupcake liner to the paper at the top of the felt stem to create the flower.

4. Cut out the pictures of your children in a circle shape and glue to the inside of the cupcake liner.

That's it!

I hope you enjoyed this craft - there will be more tomorrow.

If you want to receive daily emails instead of following the feeds, simply type your email address into the box at the top of the blog.

Thank you for stopping by!

Have craft ideas you'd like to see here? Let me know!


-Lisa :)