Friday, October 19

DIY Halloween Wall Art

 
I have a fascination with all of the "keep calm and ...." signs. They are everywhere, I know. Why I never purchased one, I'm not quite sure.  They look adorable, and a bunch of different Halloween versions have been popping up on pintrest lately. My original plan was to re-create a sign,  print it out on cardstock and then frame it.
 
I did do that, well, not the framing part though. Something is wrong with my printer, so the solid background just wasn't going to happen for me. I kept getting color fades and lines and it just didn't look all that great. My perfectionism was not about to let me settle, so a little brain storming was in order.
 
 I came up with a re-purposing project!
 
And I had to figure out how to paint particle board...
 
 A while back we had to replace our 8 slot storage cube shelf. At some point it had suffered some water damage to the top (I've given up trying to figure out how or why - I just know it involved my little people). Chris broke all of the pieces down so it would be easy to dispose of. While he was doing that, I noticed most of the undamaged parts were the same size and shape as the mock canvas art you can buy. So, we set aside the clean parts for future projects. I have to give my husband credit here, he doesn't even think twice anymore when I suggest things like this. Love him for that!
 
Can you tell where I'm going with this??
 
Chris cut down one of the longer sections for me, and I filled the holes with my hot glue gun. In the future I will use wood putty or something similar, the glue left divots. When I get excited about something I have a tendency to keep pushing forward even if I know there is a better way - oops!
 
After the glue dried, I lightly sanded the surfaces that I planned on covering with paint. I followed some directions I found on pintrest for painting the particle board.
 
 
Then I primed the board twice, lightly sanding it down in-between coats to even out brush strokes.
 
 
Once everything was dry, I applied three, yes three, coats of craft paint. I had to let the paint dry for over an hour in-between coats. The directions called for 21 days for the paint to cure, but I couldn't wait that long. I have just been very careful not to rub it up against anything. So far so good.
 
I whipped up a quick "Keep Calm" design in Silhouette Studio. The skull was a pre-made graphic from their shop, and the text was done by me using the font Impact.
 
I used vinyl here, but you could get similar results printing out a stencil and using an exacto knife to cut out the images, it would just take a little longer and more painting would be needed.
 
 
Using contact paper to keep the placement right, I attached the vinyl and there it is!
 
I looove this so much!
 
 
Have a great weekend everyone!
-Lisa

Thursday, October 18

Candy Free Halloween Party Favors

 
I remember being shocked by the amount of candy handed out at the very first Halloween party or "Fall" Party that my oldest went to at school. He was 4 and came home with a pile of tiny bags filled with treats. Don't get me wrong, I know how much fun it is to put together little things for the kids and I love seeing their eyes light up in excitement just as much as the next parent. I just wish there was a little less junk food.
 
I was bound and determined this year to find something for my kids to hand out that didn't involve sugar, and wasn't "totally lame". That's no easy feat, let me tell you. So I was thrilled when I came across these free printable bookmarks (click on the link to get your own!).

Look at how cute they are! But not only that, they meet my son's "cool" standard (he's in second grade - I know the bar will keep getting higher).
 
I printed out enough for 32 bookmarks on white 65# cardstock. After cutting them all out, I decided to laminate them for extra durability.
 
A word of advice - don't do like me and put your laminator on top of the stove. As I was snapping this pic, I failed to notice the corner getting stuck in the stove burners. Yup, I had a nice little hot plastic jam to fish out.
 
 
Here's a nice shot of my crinkled mess for you :)
 
 
After a little bit of damage control, I trimmed them up and there you have it! Super cute, inexpensive and candy free!
 
My initial plan was to punch a hole at the top of each bookmark and attach a ribbon. I was advised by my 7 year old that ribbons would make it too girly for his friends that are boys. We both agreed they were good like this.
 
 
I would love to hear some other candy free favor ideas. I'm still on the search for a preschool age appropriate handout. I would love some help!
 
Have a great day!
-Lisa

Wednesday, October 17

Pumpkin Pie French Toast - Recipe

 
I love all things pumpkin. Especially this time of year, and I know I'm not alone. Our family has a slight addiction to these pumpkin scones, and I'm always left with unused pumpkin. Last year I found I could make pumpkin butter with the exact amount left in the can. That was great, but we can only eat so much pumpkin butter. I wanted another option. And so, our Pumpkin Pie French Toast was born!
 
This is sooo good! The best part, in my opinion, is that my kids gobble this up and there is no added sugar. So you can opt to leave off the maple syrup and know that it's a wholesome breakfast (or in our case dinner) with lots of healthy vitamins.


Pumpkin Pie French Toast
 
1 Cup pure pumpkin puree
6 eggs
1/3 C milk
1/4 tsp nutmeg
1/4 tsp ground ginger
dash of ground cloves
 
Bread
 
 
1) Whisk together eggs and milk.
 
2) Add pumpkin and whisk until smooth. Add nutmeg, ginger and cloves and mix well. The mixture should be thick and have an almost custard like appearance.


3) Dip your bread slices in the mixture, making sure to coat both sides.
 
4) Cook on a griddle or frying pan on medium heat until both sides are lightly browned.


Tuesday, October 16

Easy Halloween Decor for the Front Door


Up until a few months ago, I had never been a huge decorating fan. Of anything really, the house, holidays, birthdays. I have always opted for the "less is more" mentality. I still follow that mantra, but I have been finding myself really enjoying adding a few touches here and there. It seems like just changing up one or two things in an area can really do a lot to transform the look and feel of the space.
 
This is still new to me, so I have been focusing a lot of my attention on the first impression spot of the house - in other words, the front door and entryway.


I started with a Halloween wreath I made last year. I found a base wreath on clearance for a few dollars and spray painted it black using what was left from another project. I added a few non-painted twigs that were in our backyard for contrast and attached fake cobwebs and spider rings. Easy-peasy and cute to boot (couldn't help myself there, sorry!)


I covered our front entry table with gauzy Halloween material I found. That alone made a big impact. Then I dug around our itty-bitty Halloween decor stash (I think it consists of 8 things). I typically buy my holiday decor a year ahead, right after the holiday itself when items are at a deep discount. The only thing I had to buy on the table above was an emergency candle for $1.50 (looks the same as the nicer pillar candles if you ask me). I cut out a quick vinyl spider and web and attached those.


Last year, I remember seeing a lot of cut out bats that bloggers had attached to their walls or outside of their homes. Since I just so happen to have an awesome new die cutting machine, I jumped right on that band wagon and cut out a bunch of different sized bats.


The bats were attached using Zots (or snot dots as we used to call them in design school). If you decide to try this yourself, make sure to buy the removable Zots - most are permanent and I don't think it's worth having globs of adhesive all over your walls or siding, no matter how cute these little guys are. You can gently crease the wings to make them look like they are flying.
 
 I love these bats. I keep finding myself looking at our front door and smiling - because I'm a nerd like that.
 
Have a great day!
-Lisa

Monday, October 15

The Pumpkin Patch

 
We finally made it to the pumpkin patch this weekend. I wanted to share a few pictures from our afternoon. I hope you all had a wonderful weekend!
 
 
Our family is getting ready for Halloween, and I hope to share a few of our projects with you over the course of the week.
 
Wishing you a wonderful start to a beautiful week!
-Lisa

Friday, October 12

Homemade Chicken Broth Recipe

 
Welcome back! Today is the final day in my week of immune-boosting recipes! If you missed the previous days, be sure to check them out here.
 
I'm sure at some point in your life, when you had a cold, someone suggested chicken soup. I think most of us just chalk it up to an old-school recommendation. Believe it or not, chicken soup actually does help cure a cold. Read more about that here. It has to be homemade though.
 
This is another easy recipe, it just takes some time and a little planning ahead.
 
 
What you need:
 
1 Cooked Whole Chicken - meat picked off
1-2 bay leaves
Peppercorns
1 large onion sliced
2-3 Carrots chopped
1-2 Stalks of celery chopped
6 Cups of water
Large Stock Pot with lid
Colander or mesh sieve


1) Put the whole picked over chicken in the stock pot and cover with the six cups of water. Add bay leaves, peppercorns, onion, carrots and celery.
 
2) Bring to a boil and then reduce heat to a simmer. Allow to simmer for 1 hour, skimming off any fat that rises to the top. I usually cover mine with a lid.
 
3) After an hour, remove from heat and pour the liquid into a heat safe container or another pot, with either a colander or fine mesh sieve.


That's it! Super easy, just a little time consuming.
 
 
I buy our free-range chickens from a local farmer and end up paying about $12 each. That may seem like a lot, however I can typically get about two real dinners out of the chicken meat, and I end up with 4-6 cups of stock for soup and cooking. So if you were to add all that up, I think it's a pretty good deal.
 
If you want to make chicken soup, all you have to do is add some noodles, extra veggies and salt and pepper to taste. We make these noodles.


Pair your soup with some crunchy homemade bread or rolls and you've got a quick, nutritious and warm lunch or dinner!
 
 
Have a great weekend everyone!
-Lisa

Thursday, October 11

Garlic and Oil Saute Recipe


This is day four in my week of immune-boosting recipes. If you missed the other days, be sure to click here!

  Garlic is a great health-booster, and in my opinion necessary in a healthy, balanced diet. It has been used medicinally for thousands of years. Garlic lowers blood pressure and LDL Cholesterol. It helps regulate blood sugar and prevent blood clots. It also has anti-viral properties and antioxidants. It has a lot more health benefits, click here to read more.

  You need quite a bit of garlic to reap all those rewards. A super easy way to get a large dose of garlic is to saute veggies and pastas in garlic and oil. If you've never sauteed, don't be intimidated, it's actually really easy!

  Below is my go-to easy garlic and oil saute recipe...

What you need:

Large frying pan or saute pan
Olive oil (organic if you can)
Sea salt
Pepper
Minced Garlic
Wooden spoon
Any raw or lightly steamed veggies or cooked pasta


1). Pour enough olive oil into your pan to thinly cover the entire surface area.

2) Turn on your stove to med-high heat and sprinkle 1/4 tsp sea salt and 1/4 tsp pepper (or more to taste). Add 1-2 Tablespoons of minced garlic - again, depending on your tastes and how garlicky you want your dish.

3) Allow your oil mixture to heat up for about a minute and then add your veggies. Push the veggies around in the pan with the wooden spoon while they cook to avoid burning. Continue in this fashion until your vegetables are tender.

4) Turn off the heat. If you would like to add pasta (it must be fully cooked), now is the time to add that to the pan and again push everything around with the spoon to avoid sticking and burning.

5) Transfer everything to a bowl or serving dish and you're done!

This is so so good and has endless possibilities!

Wednesday, October 10

Ginger Tea Recipe

 
Welcome back! It's day three in my Immune-Boosting Recipe week. If you haven't already, be sure to check out day's one - Matcha Muffins and two - Green Smoothies.
 
  Ginger has been used in natural remedies for ages. Ginger has anti-inflammatory properties, and is very often used in cold and flu remedies. To learn more about the benefits of ginger, click here.
 
Ginger tea is one of my favorite drinks in the fall and winter. I also love drinking this tea when I have a sore throat. It's so easy to make too!
 
 
Ginger Tea
1 C Hot Water
1 Tbsp fresh ginger
Honey to taste
 
 
You will need a vegetable peeler, 2 cups, a fine mesh sieve and a grating tool for this recipe.


1) Using a vegetable peeler, remove the skin from the end of a fresh ginger root.


2) Grate 1 Tbsp of ginger directly into the hot water. I usually eyeball this measurement, it's pretty forgiving.
 
 
3) Allow to steep for 2 minutes. You can cover the cup with a towel or small plate to help keep the water hot.
 
 
4) Pour the liquid from one cup to the other, using a fine mesh sieve to catch the ginger bits. Push any extra liquid out of the pulp in the sieve.
 
 
Add honey to taste if desired, and enjoy!
 

Tuesday, October 9

Green Smoothies

 
  Welcome back! This is day two of my Immune-Boosting Recipes week. If you missed yesterday's Matcha Muffins, be sure to check it out here.
 
  We are a smoothie loving family. I've been buying huge tubs of plain yogurt to make breakfast smoothies for years now. Plain yogurt (yes plain, everything else is loaded with either sugar, or even worse, artificial sweeteners) is filled with probiotics that play a large role in creating and maintaining a healthy immune system. Pair that with a bunch of fruit and fresh, raw greens that add more vitamins and antioxidants, and you've got yourself one healthy, immune boosting drink!
 
 
  These are so easy to make, and it can be done in a regular blender. If you're lucky enough to own a blend tec or Vitamix, your smoothies will be smoother - like that? But any old blender will do just fine. You will likely have little green specs visible in your drink, but be creative. You could tell your kids it's a monster smoothie, or alien tonic (that last one worked for me).
 
 
Another nice aspect to the smoothie is how versatile it is. You can mix and match fruits and juice and greens. Experiment a little and see what your family likes best.
 
 
Here is how we do ours...
 
 
Green Smoothie
 
1 C plain yogurt
1 C juice (apple, orange, grape - anything)
1 banana, broken into chunks
2 C frozen fruit
Fresh, raw spinach
1 Tbsp Chia seeds (optional)
 
1) Add all your ingredients except the spinach.
2) Add spinach  (I just fill it to the top)
3) Cover and blend. Using a spoon, push down the spinach and blend.
4) Repeat until blended to a uniform consistency


This smoothie we made didn't end up so green. We used a lot of blueberries in this batch, so it had more of a brownish color to it. Thankfully my little ones could have cared less. They absolutely love green smoothies and ask for them daily.
 
What are some of your favorite green smoothie combinations?

Monday, October 8

Matcha Muffins Recipe


  I hope you all had a great weekend! We were finally able to venture out of our house for a while - everyone is on the mend and feeling much, much better.
 
  Last week, I shared one of our favorite quick and healthy snacks, you can view that post by clicking here. I also mentioned that I was starting a new series on the blog - Immune Boosting Recipes. Every day this week, I will be sharing a new recipe that has immune boosting ingredients. Most of these I will try to keep kid-friendly since that was my main purpose in this pursuit - to boost my children's immune system as we march into cold and flu season. After this week, I will continue to add recipes to this category as I find good, kid-friendly and relatively easy to fix dishes and snacks.
 
  Which brings me to my first recipe to share... Matcha Muffins! If you're not familiar with matcha, you can learn more here. What is so great about Matcha you may ask? To start, it has more antioxidants than blueberries, pomegranates and spinach (source). While that would be reason enough for me, it has also been touted to help in the fight against cancer, HIV and obesity (source).
 
  Matcha is typically consumed as a tea, but I know my children well enough to not even attempt to offer that. I figured my best best would be to bake it in something I know they already enjoy. On a side note, when you are purchasing matcha, read the labels very carefully. I was distracted and in a hurry when I bought mine, only to find out at home that it is not 100% matcha, but a mix of that and green tea. So, when you make your muffins, they will be a bright green color, and not the color of the muffin here. This worked just as well, but it also has itty-bitty tea leaves in it. I ordered pure matcha from Mountain Rose Herbs (were I get most of my herbs and spices), but I have to wait for it to be shipped.
 
  I was so excited when my kids gobbled these up! I did drizzle a little honey over the top to add some extra sweetness. There is a distinct tea flavor in the matcha muffins and I was afraid they might get snubbed by my little food critics. Over time, once they are accustomed to the flavor, I will be able to use a little less honey and then hopefully none at all.
 
 
Matcha Muffin Recipe
 
1 2/3 C  Whole grain flour
1/2 tsp  sea salt
1 tsp  baking aluminum free baking powder
1 1/2  Tbsp Matcha
1/2 C  organic cane sugar
1  egg
1/3 C  applesauce
1 C  Milk
 
Pre-heat oven to 350 degrees - yeilds 12 muffins
 
1) Whisk together all of the dry ingredients in a medium bowl.
2) In a small bowl, add egg and applesauce. Whisk together.
3) Slowly pour milk into the egg and applesauce mixture, whisk while pouring.
4) Add the wet ingredients to the dry ingredients and gently mix until just combined - be sure not to over mix.
5) Fill muffin tins 3/4 full.
6) Bake for 25 minutes or until a toothpick placed in the center comes out clean.
 
Allow to cool and enjoy!

Friday, October 5

Healthy Snack and Immune Boosting Intro

 
Lately it seems like my children have been sick constantly. Really, every other week someone has something, and a lot of the times it's two or all three that have a cold, fever or something else. I know that part of the problem is Hannah starting public school for the first time. Her body hasn't built up immunity to a lot of the common colds that swarm the schools. Unfortunately she has been getting sick the most, and I'm sure that's why.
 
I have also convinced myself that it has a huge part in what has been on the table these last few months. Our schedules have been crazy and I let homemade healthy recipes fall to the back burner. We are still eating "ok", but most of it is processed or take out - which is not alright with me.
 
So, as we head into cold and flu season, I am arming my recipe index with immune boosting snacks and meals. Last year, when we were eating really well, we were hardly sick at all. We don't do flu shots in my house, and I'm not a fan of supplements. I think the best thing I can do for my family right now is build up their germ-fighting immune system as best I can with real and whole foods.
 
This coming week, every day, I will be sharing a new immune building recipe. After that, I hope to add more health boosting recipes regularly.
 
To kick-start this new little series on the blog, I thought I would share a quick, easy and delish little snack you can whip up in no time at all. These little guys are packed full of healthy ingredients, and are a crowd pleaser as well - you can't always say that.
 
For the recipe, click here.
 
Have a great weekend!
-Lisa

Thursday, October 4

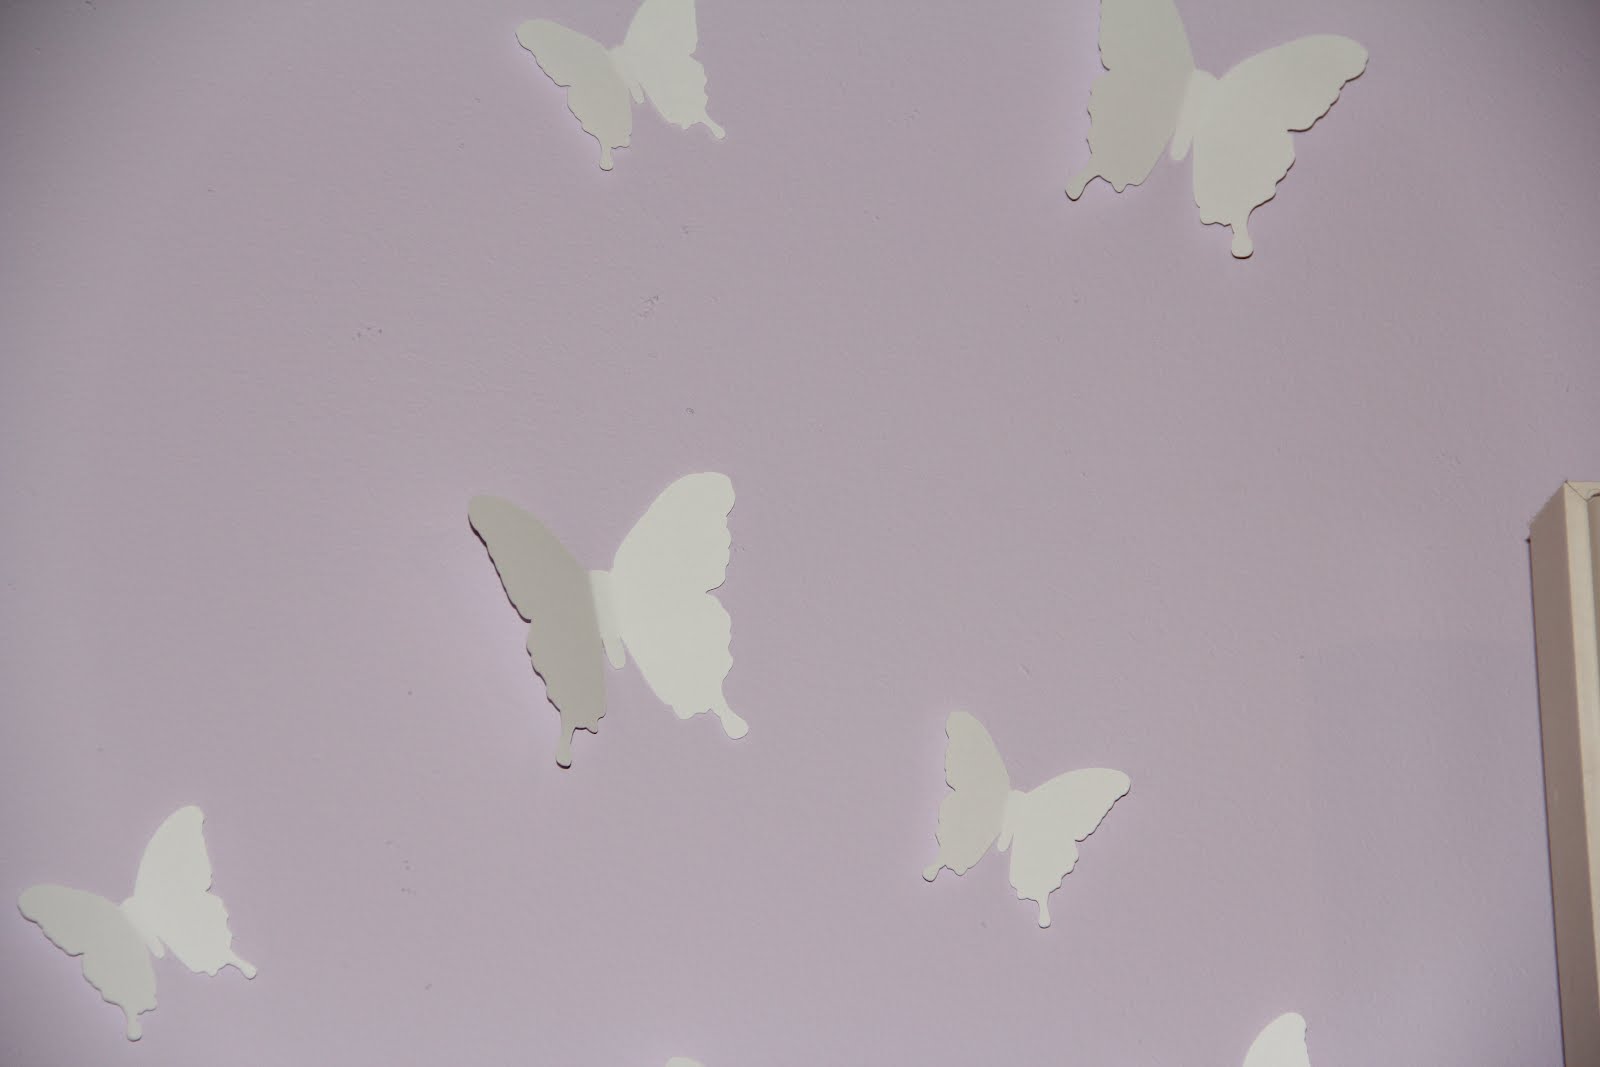
DIY Butterfly Wall Art


Christmas came early for me this year my friends! A few days ago, my very own Silhouette Cameo showed up on my doorstep. Yay! For months and months I've been planning, plotting and pinning all the different projects that would be made possible with this awesome machine. I waited forever before finally buckling under the crafting pressure to actually buy it. But now that I have it, I'm thrilled!
 
There was a bit of a learning curve to get it up and running smoothly - and I think I have most of the kinks ironed out. Or at least I hope.
 
This was my first real project using the machine. You could easily replicate this by using butterfly hand punches. I think I have seen them at crafting stores. If you have a Silhouette, all you have to do is place nine regular sized butterflies on an 8.5 x 11 board, and six 3" butterflies on a board.


I used 65# white cardstock for this project. I absolutely love how white pops on pastels. Once you have your butterflies cut out, all you have to do is slightly bend each wing up. I used double sided tape to attach them to the wall. So far they are holding up well.
 
My girls were thrilled to see the butterflies - and I think that's what made the project a success for me.
 
Another awesome part? It only took about 15 minutes to do!
 
 
Have a great day!
-Lisa

Wednesday, October 3

Creating Space


Creating office spaces in closets has been showing up all over pinterest and on blogs like mad lately. Naturally, I ran to my closet to see if it could be done. We have a good size walk-in closet - but it had been neglected and was a mess of clothing piles, jammed shelving and quite honestly, boxes filled with unknown treasures ;) I'm a little embarrassed to admit this so openly, which is why I am sparring you a before shot of this project.
 
I spent an entire afternoon emptying the closest, dividing it fairly between Chris and myself, getting rid of what we didn't need, use or want, and organizing what was left. Doing that freed up an entire wall in my closet.
 
Then I happened across a handmade crafting desk on craigslist for only $20! The dimensions were perfect for our space - it almost seemed to good to be true.


This is a super heavy piece. It was built out of cabinetry and has a heavy duty laminate counter top. While we were trying to move it into the van, the leg caught and splintered so bad it had to be removed. Thankfully Chris is a great problem solver. He drilled a small 2x4 to the wall to act as a supporting shelf for the counter top. It's sturdy as can be and now has extra leg space below.


 The insides of the drawers on this desk were a little less than desirable. Even after a lot of washing and sanitizing, this is what I had to work with.
 
 
Sooooo, with a little decorative wrapping paper, some spray adhesive and an exacto knife, I made some custom drawer liners.


I love the way this turned out! I have had the paper in for a couple of months now and so far it is holding up wonderfully.
 
The original plan for this space was to house our computer, but in order to do that, we need to install an outlet. In the mean time, I've been using it as a crafting table. To be honest, I might just end up keeping it as that. Or it could even turn into a vanity if I were to add a mirror... Not sure yet, but I am sure that I love the extra space that was created with this project.
 
Have a great day!
-Lisa