Monday, December 31

Holiday Update

 
It has been a while since my last post. I got bit by the scrooge bug and couldn't shake it. I'm not sure why, but I had no interest in decorating a lot or going on baking spree's this season. I didn't want to shop and I didn't really have anything I felt was worth while to post about here. I want this space to be as upbeat and motivating as possible, so during my little scroogy funk, I decided to just stay quiet and disconnect a bit. I also took a little break from social media and to be honest, not seeing what everyone is doing every hour or so has been refreshing.
 
For some reason I also seemed to boycott my nice camera too, so here's a little update in photo's that are not so great because they came from my phone.
 
I am, however out of my funk and ready to start a new year - with nice pictures and everything! :)
 
 
Solstice Morning before a candle lit breakfast.
 
 
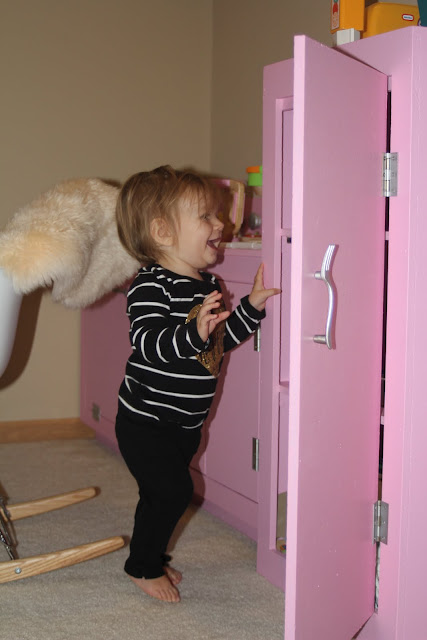
Stella had some major molar action during the last few weeks, and this was the only place that kept her happy.


Carrot apple pear juice, fresh from our new juicer! I'm so excited about this! And of course a homemade mustache glass, because juice just tastes better in a mustache glass.


Sharpie mug gift makings, courtesy of Pinterest - Love Pinterest!
 
 
A quick, and terribly blurry snapshot of my littlest reader.
 
I hope you all had a wonderful Holiday and have a safe and Happy New Years!
 
 
I will be back in a few days.
 
Take Care!
-Lisa

Monday, December 3

Natural Homemade Lip Balm and Shop Update


I have exciting news! My esty shop is up and running again! Yay!  You can visit it here.
 
The newest addition? These awesome little tins filled with organic goodness.
 
I have been experimenting for quite some time with natural beauty products.
 
Lip balm became my front and center focus when my four year old found a sudden obsession with the stuff. Commercial lip balms can contain petroleum, mineral oil, aluminum salts, and artificial sweeteners, just to name a few. Combine that with the fact that not only does lip balm rest on your lips, you ingest it as well.  I remember being a kid and hearing that the average woman consumes 7 POUNDS of lipstick/balm in a lifetime! Yikes! I don't know if that's true or not, but either way, whatever is going on my child's lips or skin needs to be safe.


So, just for my little Hannah, I came up with two yummy smelling lip balms. Mint Chocolate and Vanilla Mint. One goes on clear and one adds a hint of color.

And do you want to know where that hint of color comes from? Cocoa powder! Yup, the stuff in your kitchen cabinet. These balms are made with organic olive oil, organic beeswax, raw honey, essential oils, vitamin E and in the case of the mint chocolate, cocoa powder.

That's it, pure and simple.

And I love them! So much so, that I think other people might love them too. I have a bunch listed in my shop. These are large 1oz tins that will surely last a long time.


And just for fun, here's a few pic's of my quickly growing baby bean...


And her very helpful big sister...
 
 
Happy Monday everyone!
-Lisa

Tuesday, November 20

How to Make Calzones - Recipe

 
The holiday's are fast approaching and it seems like the closer we get to them, the busier our days become. This can easily turn dinner time into stress-time or take-out-time.
 
I try to do a little damage control early in the season by pre-making and freezing a bunch of easy dinners. And while I have quite a few recipes that make the cut, our calzones are by far the favorite.
 
They are easy to make, inexpensive and freeze perfectly. Pair that with this awesome no-rise-time crust (and my favorite at that!) and you have an easy, fast and healthy meal.
 
Have your kids make their own and they will likely love them even more.
 
What you need:
Pizza crust - I use this recipe
Pizza sauce - click here for my recipe
Mozzeralla cheese
Toppings of choice
 
 
1) Prepare the dough recipe. Divide into eight balls by breaking the large mass in half, and then both of those in half, and then those again in half. You should end up with eight equal sized dough balls. I left one large here for Chris.


2) Roll the dough ball out on a lightly floured surface and try to create an oval shape. Add about 1 tbsp of sauce to the bottom half of your oval.
 
 
3) Add your topping and cheese on top of the sauce. If you look closely, you can see the frost crystals on my cheese. I forgot to thaw it out, but that's the beauty of freezing cheese, it doesn't seem to matter. By shredding my own blocks of natural cheese, I end up paying about 50 cents per cup, which is about half the price of the pre-shredded generic versions. So worth it!
 
 
My calzone was made with pesto instead of sauce and shitake mushrooms - yum!! 
 
 
4) Pull the back of the dough over the top of your calzone and create a sandwich out of  it. It should look like the photo below.
 
 
5) Press the edges together to seal them and then roll them up and press the inside of the roll down to seal again. See the picture below for referance


6) Most of the time, I have the kids helping me when I make these, so they make their own. We take a knife and carefully mark each calzone so we know who's is who's. Even if you don't need to label your calzone, you still need to put one or two cut marks in the top to allow air to escape while it's baking. 
 
 
7) Bake in a 350 degree pre-heated oven for 25-30 minutes. Allow to cool for 5 minutes and then enjoy!


Friday, November 16

Thanksgiving Banner


Can you believe in less than one week, Thanksgiving will be here? It crept up on me this year, truly. I had so many things I wanted to accomplish before it got here - crafts, blog posts, new recipes...
 
I do have a few projects in the works and I am going to try my hardest to finish them up this weekend. And then of course share them with all of you during the week.
 
But today, I want to share a quick little banner I made with inspiration from the Silhouette blog, you can read that post here
 
I ended up making my own banner shape from scratch. If you have a cameo and would like to use my file, I am more than happy to share. You can download the free Silhouette Cameo files here.


I decided to use a metallic gold paper for the background. I'm loving all things gold right now. To view all the details in making this type of banner, please refer to the Silhouette tutorial I mentioned earlier.


I cut out a bunch of maple leaf shapes that were pre-loaded in my software for the cameo. Because they are not mine to share, they are not included in the free files, but my guess is that you already have them in your shape library.
 
 
Then, using some twin, I strung the banner together and using scotch tape, added bunched leaves to the corners.


Have a great weekend everyone!
-Lisa :) 

Thursday, November 15

The LP Infinity Scarf - Free Knitting Pattern


I am sooo excited to share this with all of you today! I have been playing around with creating knitting patterns for a few years now and I have finally found the courage to share one. I know that sounds silly, but I always second guess myself, and though this is a very easy pattern, I think it turned out cute and I felt compelled to share. So please excuse any beginner pattern making mistakes. Thanks in advance!
 
It's also very rare that you will find me in front of the camera, I prefer the behind the scenes role quite honestly. Chris was jumping around trying to act like we were having some major photo shoot and it was a little hard to keep a straight face.
 
This is easy enough for a beginner, but still a satisfyingly quick knit for the more advanced.


The finished scarf is long enough to wrap around twice, which will keep you nice and warm.


I used Quince&co's puffin in Honey 123. I love it for both the texture and color. You can use any bulky weight yarn for this pattern, though different brands will yield slightly different results.
 
 
What you need:
 
Size 15 (10mm) 24" circular needles
1 Skein of bulky weight yarn (I used about 110 yards)
gauge: 4" = 7 stitches
 
CO 81 stitches
 
before joining in the round, twist the loop on the left needle so that the bottom of your scarf is at the top of your needle. This is what will create the twist in your scarf.
 
1)K1P1 for one round
2)P1 K1 for one round - this will create the "seed stitch"
3) repeat 1&2 until the scarf measures 5" in thickness
4) Bind off using K & P
 
**Should you end up with two knit stitches or purl stitches in a row where you joined your piece, simply k2tg and that will even it out**


Tuesday, November 13

Kid's Bathroom Update


For the last few months I have been on a make-over roll. If I could, I would re-do every room in our house. That's not really in the budget though, so I have been doing my best to tweak things in every room just enough to create a new, fresh look.
 
I showed you the playroom a couple of weeks ago and today I want to share the kids' bathroom.
 
 
I really wish I had one of the awful before pic's for you. I was so motivated to paint one night that I did it all, by myself, after I put the kids to bed. Taking a picture didn't cross my mind until AFTER everything was done. Just imagine an ugly square metal bar where the white cabinet is, and unpainted, blank builder walls. It's a dark room with no natural light, and all the unpainted walls gave off a yellow hue. No matter how clean it was, it just felt dirty to me.
 
 
Gray is pretty popular right now as a wall color, and I must say I absolutely love how it makes white pop. I figured that would be the perfect solution to my dingy wall problem. Lot's of gray and white.
 
 
My first step was removing the old, ugly hardware from the wall, patching any holes and then painting it gray. We use Dutch Boy Refresh. It's a non-VOC, "green-standard" paint base that is both affordable and locally available. It's not 100% VOC free once you add the color, but it's close and practically odor free - we love it.


After the paint dried, Chris hung the cabinet for me. It's one of those cheap build it yourself cabinets that only set me back about $25. I added the pretty (well I think it's pretty anyway) background to liven it up a bit. I love the storage this added to the room. This bathroom is SMALL, like really, really small, and only had under the sink storage. So this added to the functionality of the room. I need to find a way to sprucen it up a bit with decor pieces.


I found this vase at World Market that I had hoped would fit inside the cabinet's bottom shelf, but it was too tall. So I popped it on top. I'm not sure it works, but it does add some more height to the space, which helps.


Oh! And my favorite part of this update, and what inspired the whole thing - these hooks! LOVE them! They are from Anthropology and were definitely a splurge, but they add enough interest to the space to make them worth every penny.
 
The white shower curtain is actually a liner. I plan on using that until I find a white curtain I really like that doesn't cost too much. But for now, I think it works great as is. It might just end up staying, I haven't really decided yet.


Here is the best full bathroom shot I could get. This kind of gives you an idea of how tiny it really is. I did have wooden picture frames hanging on the walls before. I've painted them white, and I just need to make some wall art for them. I'll share those when they are done.
 
Do you have any home updates in the works right now? I would love to hear about them!
 
Take care,
Lisa

Monday, November 12

Candied Cranberries - Recipe


It never fails. The temperatures start dropping, the leaves have all but fallen, the sun starts turning in much too early and I find myself spending more time in the kitchen. Maybe it's the shorter days, I don't really know. All I do know is that every year, around this time, I start craving comfort foods. Warm, fresh baked bread, rice pudding, roasted chicken and candied cranberries top my list. Pumpkin everything has been going full swing by now and it's time to bring in new flavors.
 
I never seem to be able to transition slowly into this either. I'll wake up one day, and boom! I NEED to make all these foods TODAY. Seriously, I wonder about myself sometimes. This year, that day came yesterday.
 
Soooo, today I wanted to share one of my favorites with all of you. Candied Cranberries. Loooove these, and most of the time I end up eating almost all of them myself.
 
They are so easy to make, it's hard for me not to make them all the time. They do have a lot of sugar though, so I'm forced to keep them as a sometimes food.
 
This recipe does require overnight soaking, so plan ahead. Don't worry, they are worth it!
 
 
Candied Cranberries Recipe
 
1 Cup Maple Syrup
2 Cups Fresh Cranberries
1.5 Cups Organic Sugar
 
1) In a small sauce pan, warm the maple syrup (do not bring to a boil, just make it luke-warm or the cranberries will pop).
 
2) Rinse and dry cranberries.
 
3) Place the cranberries in a stainless steel or ceramic small bowl. Cover with the maple syrup and then cover the bowl with a towel and allow to soak overnight in the refrigerator.


4) Once the cranberries have soaked overnight, remove them from the fridge. Using a large spoon, scoop up a few cranberries and allow as much syrup to drain out as possible.


5) Put the drained cranberries in a bowl filled with sugar and lightly push them around until they are coated in sugar.


6) Place them gently on a parchment covered baking sheet. Continue this until all of the cranberries are on the sheet. Allow to dry (about 1-2 hours) and then refrigerate.


Does this time of year put you in the mood to cook or bake? What's been on your table lately? I would love to hear what your favorite dish is!
 
 
Take care!
-Lisa

Friday, November 2

Knowing When to Tame The Inner Momma Bear

Photo Credit


The other night I sat at our kitchen table, listening while my son started explaining why he won't talk in his Spanish class. He used to, so I knew something new was going on.

It was awful, sitting there, watching him tear up and choke on his words. Finally gathering himself enough to spit out that the last time he was called on in class, he answered every single question incorrectly and everyone laughed at him. Even his friends. I felt sick. I wanted so badly to swoop over to him, wrap him in my arms and tell him he never had to go back to that classroom again.

But instead, I looked him in the eye and told him how smart he was. That I knew there were other kids in his class that didn't know the answers either. Sometimes people just go along with a behavior because other people are doing it.

Was that the right thing to say? I really don't know. Deep down I was fighting with my own sudden anger at the insensitivity of his teacher. How many questions was he going to ask him in front of the classroom, knowing he didn't know the answer? Is that really how it played out? I wasn't in the room, so I will never know.

Then I was reminded of the first introductory meeting for the Spanish program in his school. He was in Kindergarten then. They told us to expect tears, frustrations, and maybe even anger. The children didn't choose this path, we did for them. It wouldn't be fair for us to expect eagerness and enthusiasm.

Can I tell you, we were thrilled when that's what we got. I remember feeling so relieved that my son was embracing this new language and culture, and truly seemed to enjoy the process.

So sitting at the table, watching his red, watery eyes, my heart sank. I knew this day was coming, but I didn't want it to be like this. I don't know what I thought would happen. Maybe that it would be all roses and sunshine, him skipping across a field with his sisters, all of them speaking Spanish to each other. If one of them was struggling, the others would help the other out and then they would easily understand and hug. As I type this out, I realize how ridiculous that sounds.

Then I started asking questions. Didn't he ask for help? Was there a teacher's aid to assist him? Did they do fun activities to help reinforce what they were learning?

I will not share the answers I was given, because I don't think that is fair. But I will say this. I grew angrier and angrier with each answer. I felt like my son was being mistreated and I was ready to march my angry little self right into that man's classroom, armed with every injustice I could think of, and I wasn't going to back down. No way! That's my son, and I am his biggest advocate!

That's when I noticed my hands were balled up into fists and my chest was tight. I had been pacing around the room, looking up all the suggested references and resources provided by his teacher, all of which were disappointing.

I stopped. This is when I know I'm over-reacting. This is when I know the instinctual Momma Bear is showing her teeth and I need to take a deep breath and step back from the situation.

I looked at my son. I told him that we would figure out a solution, but in the mean time, the best way to prepare himself for the classroom was with knowledge. We agreed it would be good to sit down together for an extended period of time weekly to discuss and review everything they were learning in class. This is in addition to his regular work. We spent about two extra hours reviewing the language that night, so his willingness to do that proved to me that he does want to learn. That Chris and I didn't make a mistake enrolling him in the program.

I'm glad I didn't send off a nasty, accusatory email. I started looking at it from another perspective. I'm sure there were reasons things were done the way they were. It wouldn't be right, or fair for me to fly off the handle without all the facts.

So instead of marching into the classroom yelling, I arranged to help out for the afternoon. To see for myself just how the class was run, and what his teacher's style and availability really was with the children. And, to see how my child really was in the classroom. I know in reality, he is not perfect, so before I go pointing fingers, I want to make sure the injustice is real.

I felt so much better leaving the classroom that afternoon. Was everything perfect? No, far from it. But, after speaking with his teacher and explaining why my son suddenly stopped participating in class and discussing alternative ways to handle situations and the actual work, we both have new view points on where we should go from here, and that feels good.

I'm still questioning if I handled the situation correctly. I guess I'll just have to wait and see what happens. This parenting thing isn't easy. I guess I'm starting to understand better the statement "bigger kids, bigger problems". We all want what's best for our children, and we all want to protect them from life's unfairness. It's just knowing when to take a step back or take action that poses the most difficult for me. Hopefully I'm on the right track.

Thursday, November 1

The Halloween Fairy and a Great Big Thank You!

 
I hope everyone had a fun and safe Halloween yesterday! It was pretty cold here in Northern Illinois, but we bundled up the kids and they didn't seem to mind. I wanted to share a quick pic of my kiddo's, all ready for action (grandma Gayle is manning the stroller here). I took gobs of pictures, but this is the only one where you can sort of see everyone's face.
 
Before I go any further, I just wanted to say Thank You so, so much for stopping by here and taking the time to read my blog.
 
 
 Yesterday, this little blog of mine reached 20,000 page views!
 
 
 And, not only that, it's climbing quickly! While that may not seem like a lot to more experienced bloggers, it's a Great. Big. Deal. to me - and I thank you for it :) For the entire first year of my blogging experience, I averaged about 25-50 views a week - yup, that's it.
So thank you for reading, and pinning and sharing!
 
 
I value every single reader, and I read every single comment, so please continue to share :)
 
 
We have a Halloween Fairy at our house, do you?
 
 
If you celebrate Halloween, and went out last night, I'm sure you ended up with a piles of candy. It's so much fun to go door to door and dress up, but the just the thought of all that sugar sends chills down mine spine. Lucky for me though, my children are more than happy to offer up their bags (after getting to eat whatever they want Halloween night) in exchange for a suprise from the Halloween Fairy.
 
Wishing you a wonderful day!
-Lisa :)

Tuesday, October 30

Playroom Update

 
Our playroom (a.k.a. loft) gets a lot of my attention. My girls are in this area for a good portion of almost every day. My oldest likes to keep all of his things in his room, but he does end up here from time to time. Usually for the computer or a place to read. I am in here daily with the girls and to use the computer. 
 
This room has a lot of activity, which makes it important to keep organized and functional. Because in the blink of an eye, the room can go from looking kind of cute, to a crazy pile of puzzle pieces, play kitchen toys and books.


I have made a bunch of updates lately, and I wanted to share some of the little projects and organized spots with all of you.


First, our new computer chair/rocker. I have been eyeing these cradle rocking chairs for almost a year now and wanted one badly. I sold a bunch of old clothes and things we don't need on facebook, so with that money I was able to buy this chair. Yay!


Quite a few months ago, I happened across these ottomans and after finding out they were only $16, I scooped both of them up. They are perfect for grabbing a quick book and really, you can never go wrong with extra seating.


For years we have used storage cubbies to help organize and corral our things. Would you believe we had never once purchased one of the little fold out drawers that can go with them? Seriously. I finally went ahead and picked up four of them when they went on sale and oh my gosh! I have been missing out! Case in point. The photo below. I could never store these without the help of the drawer.


The drawers also help give the cubbie a cleaner look, which makes me happy.


I have a handful of books I like to keep by the computer for quick referencing. It's nice to have them right on hand, but with our goofy corner desk that we're using right now, they don't always look so great. It took me a while to find a solution, but then one day it dawned on me that I could store the books inside magazine files. I found these for a dollar each and it has been working perfectly for over a year now.


We have a half wall in this room that we have always kept picture frames on. As much as I loved the photos they displayed, I hated the mismatched look of them along the wall. To unify everything, I spray painted all of the frames white. I absolutely love them now! They are all different shapes and styles, but the white pulls everything together. I added a few accent pieces to break up the frames as well.


One of the frames I had was really small, 3x5 I think, and I couldn't find any pictures that worked with that size. I decided to create my own little framed art. I used my silhouette cameo to make the cut outs and the images I designed on the computer. I need to re-do the Emily Dickinson quote so that you can easily read it, but other than that I am really happy with how it turned out. It's simple, but it adds a much needed pop of color.
 
I hope everyone has a fun and safe Halloween tomorrow! I'll be back on Thursday.
 
For everyone on the East Coast, please stay safe - we're sending our thoughts and prayers your way.