Pages

Tuesday, January 31

Hanger Tags - Easy Organization - Free Printables!

I am always looking for ways to streamline our mornings, especially now that I have three little ones to get up and out the door by 7:10 AM. I have never been much of a morning person. It usually takes me a good 30 minutes of slow-moving and a really hot, strong and large cup of coffee to get me going. Unfortunately, I think my children are following in my footsteps, and they don't get the option of coffee to help them out.

I have found that a little extra prep before bedtime goes a long way in this house. Which brings me to today's free printable. Hanger tags! Labeled with each day of the week, they minimize the amount of time wasted looking for the "right" outfit for each morning and reinforce the days of the week for my oldest two.

My little one loves pink, can you tell?


On Sunday night, we pick out everyone's clothing for the week and put them on hangers. I fold pants on the hanger and then put the tops on over those. Then we just pop on the hanger tags and hang up the outfits in order. This takes about 15 minutes total for all three kids, and I know it saves us loads of time overall during the week.

I may try and streamline this even more by simply adding a new outfit to the empty hanger and putting it in the back of the line. That would eliminate the 15 minute chunk of time on Sunday nights.

If you want to try it out, just click on the link below to a free PDF. There's two sets, blue and purple, in the document. I would suggest printing these out on card stock and using an exacto knife to cut them out. If this continues to work well in our house, I will probably laminate them as well.


Click here to download these for free.

Have a great day!

Monday, January 30

My Week In Photos

31/365

30/365

29/365

28/365

27/365

26/365

25/365

**Part of Project 365 - a single photo from each day of the prior week. If you do the same and would like to share your pictures, please leave a link to them in the comments section.**

Wishing you all a wonderful start to your week...

Friday, January 27

Stella Pixie Hat

In the wake of my knitting disaster earlier this week, I decided to finish up one or two projects that had just been sitting around for months and months. This one, for example, was completely done, with the exception of one seam and one button. Why do I do that? It's the easiest part, finishing a knitting project, but the part I dread. Oh well, 10 minutes after I started sewing the neckline on, it was done.


Oh! And with a pattern name of Stella Pixie Hat, how could I not make one for my little Stella.


She's happy, I'm happy. But even better, finishing this gave me more inspiration to keep on knitting on...


Have a great weekend!

Wednesday, January 25

Flourless Chocolate Cake - Sugar Free Too!


This was my first flourless cake. In fact, I had never even heard of such a thing until last week - really. I am so happy with the outcome! It's healthy, full of antioxidants, fiber, and protein. All of it is made with real food, and best of all, it actually tastes good. Since cutting the sugar out of my diet, I haven't really wanted sweets, but this recipe caught my atttention. I adjusted it to my needs, and this is what I ended up with.

Flourless Sugar Free Chocolate Cake

3 - 4oz 100% Cocoa Ghirardelli Baking Chocolate bars
1 Can (2 cups) Garbanzo Beans
4 Eggs
3/4 Cup Agave Nectar
1/2 tsp Baking Powder

1) Preheat the oven to 350 degrees and grease a 9" round cake pan. I dusted mine with cocoa powder.

2) Break the chocolate bars into bits and melt in a double boiler or according to the directions on the package.

3) Drain and rinse garbanzo beans.


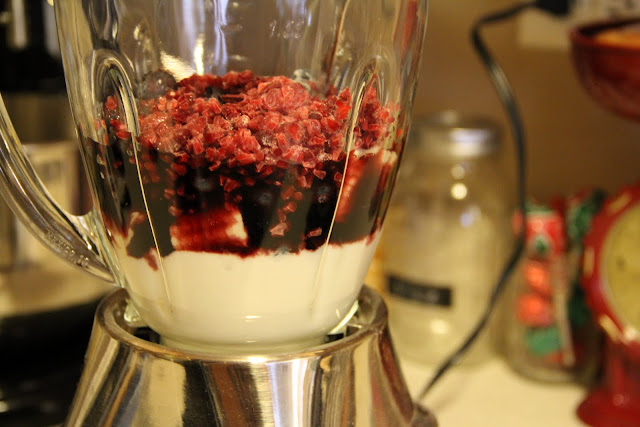
4) In a blender, combine eggs and beans and blend until well combined and frothy looking.


5) Add the baking powder and agave and blend again.

6) Carefully add the melted chocolate and pulse until completely mixed. Pour into the greased pan and bake for 40-50 minutes or until a toothpick inserted comes out clean. Allow to cool for 15 minutes and then remove from pan.


I added warm raspberries and a dollop of whipped coconut cream to the top of the cake. It's soooo good.


To make the coconut cream, just place a can of full fat coconut milk in the back of the refrigerator for one day. Open the can and remove the hardened coconut fat off the top and place in a bowl. Add half a tsp of vanilla and whisk until smooth.


That's it! I store the coconut cream in the fridge and add it to fresh berries and stir it in my coffee in the mornings. We love it.


Have a great day!


Lisa

Tuesday, January 24

Silly Words

Before...

After...

I wanted to cry. Like really, really cry. And for a split second, I thought that perhaps it could be salvaged. But unless this January/February little baby boy I'm making it for wants to be hanging out in a sleeveless sweater, it would have to be frogged. Frogged - I like that term. It's a good thing too, because as I sat waiting in the pick up line for my son, staring down at the weeks and weeks worth of knitting that was about to disappear, I thought that exact line "This will have to be frogged". And then I giggled to myself, because saying something has to be frogged just sounds kind of wonky (by the way, I like the word wonky too).

So there you have it, my sanity saver - silly words. Well, that and an understanding friend.

Keep your fingers crossed for me that this sweater will arrive to said friend, before her little baby boy does.

Monday, January 23

My Week In Photos

24/365

23/365

22/365

21/365

20/365

19/365

18/365

**Part of Project 365. A single photo for each day of the prior week. If you do the same and would like to share, please leave a link to your photos in the comment section.**

Tuesday, January 17

A New Passion

Edited Photo

Before Photo

Lately, instead of doing the crafty things I normally do (knitting, baking, sewing, crafting...), I have been stuck to my camera. I worried about what to post this week on the blog because really all of my free time has been spent taking pictures, researching photography techniques, looking at photo editing... I just can't seem to get enough :) I think I found a new love.

I promise to keep up with other topics, but for the next few months, don't be surprised if there's a lot of photo talk too.

And, just for fun, I thought I would share my first photo edit. Far from remarkable, I know, but still fun.

Have a great day!

Monday, January 16

My Week In Photos

17/365

16/365

15/365

14/365

13/365

12/365

11/365

**Part of project 365, a photo from each day of the prior week. If you do the same, please feel free to share a link to your photos in the comments section.**

Wishing you all a wonderful start to your week!

Wednesday, January 11

Saving Schoolwork


When my son started Kindergarten last year, we started getting bombarded with piles and piles of paper. I was honestly taken back by the amount actually - it all seems so wasteful. With that being said, I also found myself stuck in a weird gray area of what to save and what to recycle. On the one hand, I wanted to keep as many pieces of his intellectual and artistic growth as I could. On the other however, I knew I couldn't handle massive piles for all three children...


Then last week, I came across this post! It seemed so simple! Why hadn't I thought of that? I quickly ran out to the store and gathered what I needed to create three matching Schoolwork bins.


I followed the directions on Jen's blog, and she even provides free printables - which I happily used.


And with a little help from my happy assistant, I had three bins all set up and ready to go for each child for pre-K to 12th grade! I'm so stinking happy with this one, really.


I also decided to add cute name tags over the ugly product stickers that I can never get completely off. I just used some scrapbook paper and placed white labels in the center. I wrote each child's name on the card and then laminated them so they will hold up over the years.


So there you have it. If you want to make one of your own, click here.


Take care!


-Lisa


Monday, January 9

My Week In Photos

10/365

9/365

8/365

7/365

6/365

5/365

4/365


**Part of project 365. Every Monday I share a photo from each day of the prior week. If you do the same, please share a link to your photos in the comments section. Wishing you a wonderful start to your week. **