Showing posts with label gardening. Show all posts

Wednesday, August 2

Right Now


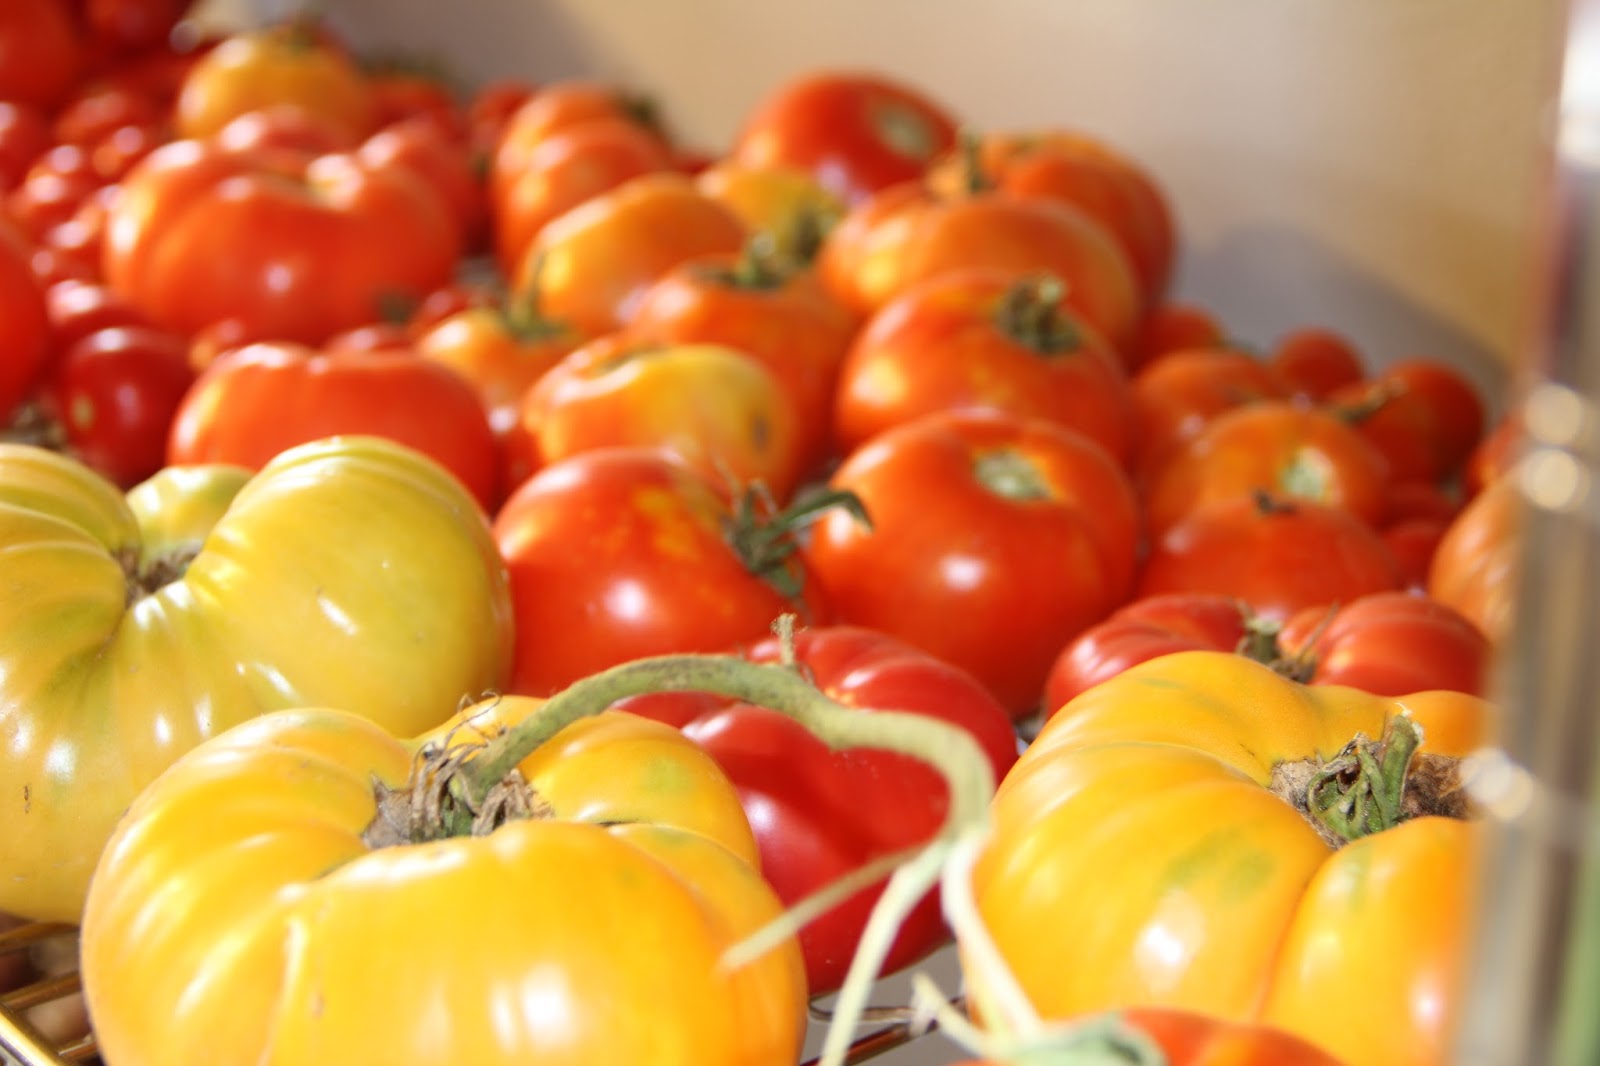
Right now, the garden is producing a TON of food, and as a family, we have been busy preserving the bounty. You'll notice if you click on the label "right now" at the bottom of this post, I have been blogging about our "right now's" for quite some time. I think it's fun to go back and look at these, it brings me back to those moments, almost like a visual journal.

Here are a few photos from the last week or so around our little homestead...


The older two children like to spend time with me out in the garden, as well as the kitchen. They always have.

My youngest however, has declared she will never be a gardener, she doesn't have time for that. She's going to be a rock star. If I want to, I can bring her vegetables after her shows. Really, these were her exact words. She may still come around, but it will have to be on her own terms. I don't force the kids to garden or participate in anything homesteading related they don't willingly want to. That is, aside from age appropriate house chores, for fear they may end up resenting it down the road.


The carrots pictured above were washed, peeled, cut into sticks and put in a large bowl of water in the refrigerator. They stay fresh and crisp for an incredible amount of time this way. This works with chopped lettuce and pretty much any other greens as well. It also makes for quick, easy and healthy snacking for everyone in the house. I'm proud to say not a single carrot went to waste, and that bowl was huge.


There has been a bit of jam making, but not nearly as much as I would like. I'm going to get adventurous and try some unusual combinations this year. I'll be sure to share those when I do.


Here are links to the recipes for the jars you see pictured above...


** The pickle relish was made with a Mrs. Wages spice packet. **


My youngest won't help in the yard, but she's more than happy to help make things pretty label. We buy most of our grains and flours in bulk. My poor neighbor ended up with a 50lb bag of oats on his doorstep the other day and walked it over to us. I'm sure he thought we were crazy when I told him what it was.

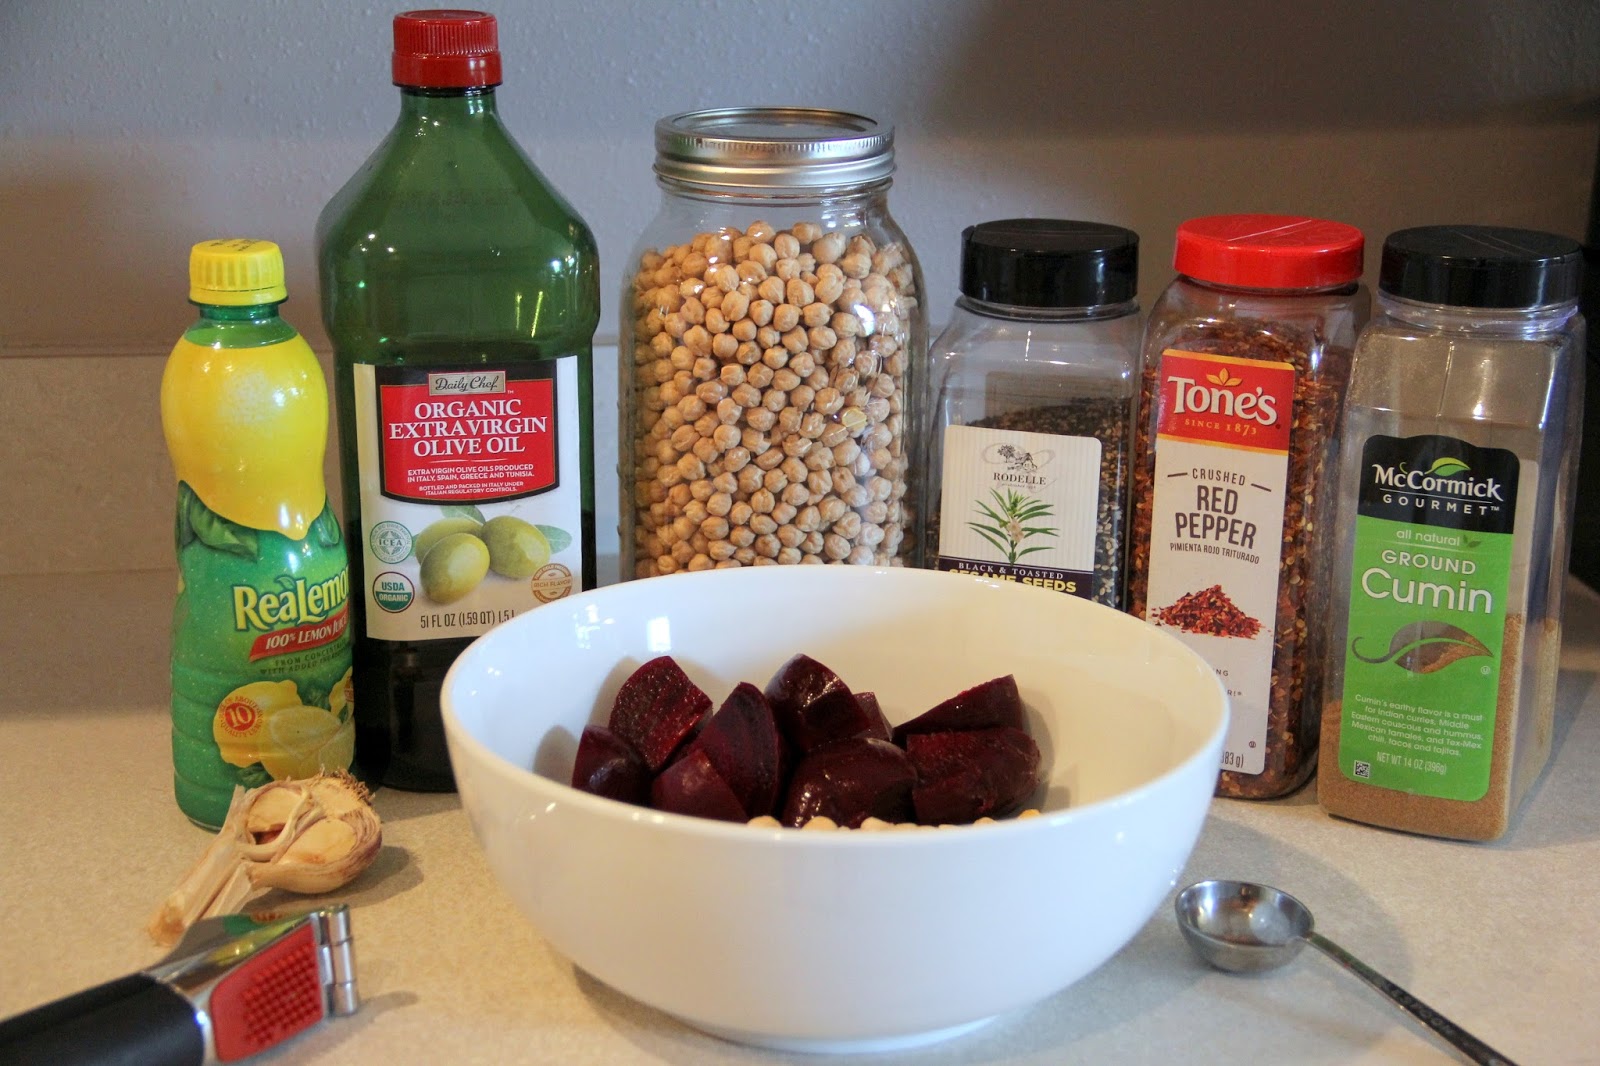
Buying organic can get expensive, so to cut costs, we buy bulk when we can. This should last us all year. I store the gallon sized bags in our freezer to help preserve freshness. We do this with whole wheat flour as well.

Why is it so important to buy organic?

Commercial oats and wheat are heavily sprayed with pesticides prior to harvesting. Even though they are hulled and for the flour, milled, a large amount of pesticide residue is left on the grains. It's worth every extra penny to me, to know that when I feed my children (with their tiny bodies that can not handle as much pesticide residue as an adult), they are ingesting wholesome, clean and pesticide free food.


Not sure what to do with all those oats?


After we chopped up all the carrots, I gave some tops to the chickens and the rabbit. The only one interested in them was the dog. She scared off the chickens...


Then promptly turned her nose up at the carrots. These were cleaned up and the chickens went back to happily searching for bugs.


Sunday, July 23

Easiest Way to Find Tomato Hornworms


Want to know the easiest and fastest way to find every Tomato Hornworm in your garden? Read on...

If you have a garden and you grow tomatoes or peppers, chances are, you've encountered the hornworm. You probably also know just how frustrating these guys can be, devouring your whole plant in a matter of what feels like hours (it's probably longer than that, but with a little nibble here and a little nibble there, they will ruin the whole plant fairly quickly).

I refuse to use any sort of pesticide in our garden - to me that defeats the purpose of growing your own. So, aside from the Neem Oil mixture, I'm left hand picking these huge dudes off my tomatoes and peppers. Which would be fine, if I could actually see them. Truly, I don't know if I dislike them because of the damage they do, or because it's almost impossible to find them all. They have achieved an ultimate level of camouflage, that's for sure.

Until now that is.

Chris and I were talking about the garden one night after the kids were in bed and we were having a little pity party over our eaten up plants. I've been nursing these plants for six months now, they're like little babies. It's really hard to watch all your hard work get destroyed in a matter of days and not feel like you can do anything about it. All of a sudden his eyes lit up and he said "I think they glow! Let's buy a black light flashlight and try it out." I looked at him all dumbfounded and said "They make black light flashlights????"

Guess what? They do! They glow and yes, they make black light flashlights. You can buy one here.

Once it's dark out, just walk outside and shine your little flashlight over your plants. The hornworms pop out like neon. Seriously, it's like an 80's flashback garden party.


In the last 5 days, Chris and I have removed 23 hornworms using this method. We are finding them when they are super small right now too, which was impossible before.

Now go buy yourself a flashlight and go Hornworm hunting - you'll thank me later, trust me.

Friday, July 14

How to Get Rid of Japanese Beetles


** This is a super easy way to get rid of thousands of Japanese Beetles quickly and without having to spray pesticides. **


If you have any kind of fruit or berry bush, I'm sure you know exactly how frustrating Japanese Beetles are. They come in swarms and devour plants until there is nothing but a skeletal structure left. Last year I looked all over Pintrest for different recipes to protect our blackberries and fruit trees. I found one mixture that worked well, but had to be applied pretty much daily to keep these gross little pests away. I also happened to pull a bunch of ligaments in my foot trying to avoid a swarm of them after spaying. Wet grass and slick shoes don't mix my friends.

This year I wanted to try something easier, and a little less hands on with the bugs. Amazon is typically my first go to for products, and I was excited when I found these traps. I ordered two because we have quite a bit of space to cover.


I took this picture right after I hung the bag. I had beetles following me to the post from my front door - this thing works that great.


This was the following morning. I think it's worth noting I set the bag up around 8:30pm the night before. I'm convinced this bag was filled to the brim hours after installing it. Side note, I was gagging while taking this picture and fully utilizing my zoom option on my camera.


Seriously, look at that. It makes my skin crawl, which is problematic because just by looking at this photo, it's pretty clear I needed to either change the bag or come up with another idea.

I went with another idea...


I decided to try hanging a garbage bag over the shepherds hook that the bag was attached to. This worked, until an hour later the bag was so heavy that the drawstring was closing the opening at the top.

A few minutes of motivating self-talk and with the moral support of my older daughter, I was able to poke holes in the top of the bag and attach them to the frame of the trap so the drawstring couldn't close completely. I'm sure we looked crazy. The two of us kept getting close enough to get dive bombed by the bugs, only to yelp and run back to a safe distance. It took a bit, but we did it.


That's a lot of bugs.

These Japanese Beetle traps work really well, so much so, that I would suggest keeping them at least 100 or more feet away from the plants you want to protect. The directions say 30 feet is enough, but I would argue that. To see the exact bags I used, click here.


Here's one of our bell pepper plants. I couldn't bring myself to end a post on a garbage bag full of bugs. A garbage bag I need to go empty at that. Wish me luck...

Wednesday, July 12

Easy Beet Hummus Recipe


** Make this easy beet hummus in just a few minutes - it's so good! **

 It's safe to say I'm the only person in my house who LOVES beets.

My kids could take them or leave them, and my husband won't go near them. That being said, I try not to go crazy planting them. I only have a few left to pull  (more seeds will go in the ground in a couple weeks for a Fall harvest) and this afternoon I realized I hadn't made my favorite beet hummus this summer. The coolest thing about hummus, aside from being delicious, is that you can freeze it. I didn't know that until last year. So now I can make a huge batch of this and freeze portions to enjoy during the winter. This recipe is super simple, all you need is a food processor or high powered blender. I used my Vitamix for this.

**Scroll down for the detailed recipe**


Here's everything you need. I'm a visual person and enjoy seeing process photos, so incase you are too, here you go.


See, I even put everything in a bowl and arranged it to look nice, just for you. Normally I would just toss everything in the blender and go.


My very trepidacious taste tester and hand model.


The fact that she ate this, knowing it had beets in it, and went in for a double-dip makes this a mom win for me. Remember, no one else in my house likes beets...


Here's the best part - you can freeze it! I line a cookie sheet with either this slipat or parchment paper, plop a large spoonful of hummus on it and then put it in the freezer. A couple hours later, just pick them up and put them in a freezer baggie. It's all portioned out, so it won't go to waste if no one else in your house likes beets either. It thaws perfectly in the refrigerator.


Beet Hummus Recipe

3 Cups Garbanzo Beans (or 2 cans)
2 Cloves of Garlic minced
3 Roasted and Cubed Beets
3 TBSP Olive Oil
1/4 C Lemon Juice (about 2 lemons)
1/4 C Toasted Sesame Seeds (or 2 Tbsp Tahini)
3/4 Tsp Cumin
1/2 Tsp Salt
1/4 Tsp Red Pepper Flakes
1/4-1/2 C Warm Water


1) Toss everything in the blender or food processor and pulse until the hummus has a semi-smooth consistency.

2) Slowly pour in the warm water while blending/processing until it is super smooth.

That's it!

Sunday, July 9

Natural Organic Insecticide That Actually Works


**Scroll down to see the recipe for this all natural organic insecticide**


    Last year was our families very first garden. I remember being so excited during the Spring, all of our cold weather crops were ready to harvest and we hardly had a single pest to deal with. The weeds were minimal, and in my inexperience I couldn't help but wonder to myself why everyone made such a big deal about gardening - this was easy!

   Fast forward to late June early July, ummmm hello Japanese Beetles (I tore ligaments in my foot avoiding a swarm of them - seriously), Tomato Horn Worms (I thought it was the cutest thing ever until a friend promptly told me to remove it immediately - by the time I got there, it had devoured three quarters of our banana peppers), Spider Mites (resulting in gross looking sickly tomato plants) and aphids - oh the aphids...

   These garden pests knocked me off my proverbial garden stool pedestal faster than I care to admit. I tried a few different natural things, but ended up  succumbing to the idea that we just wouldn't have huge harvests and I would have to do a lot of the bug removal by hand.

   Over the winter I did a lot of research and came across Neem oil.  Neem oil will repel and manage over 200 different types of garden pests - that's a lot! It is also a fungicide and when applied correctly it will help with root rot, black spot and sooty mold. To read up on this more, click here.

   Once the temperatures started to rise and I knew the bugs were on their way, I whipped up this super simple inexpensive Neem oil solution. I have been applying it about once every 5 days or so, very lightly and while there are still some bugs, for the most part, my plants are growing strong without any issues.

   The best part of all, this is safe for both people and animals. Below you will find the recipe I use. If you click on the highlighted items, it will take you to the actual products I use. I make this in a half gallon mason jar and then use a funnel to transfer it to a spray bottle. This just reduces the amount of times I have to remake the solution.


Natural Organic Insecticide

1 Half Gallon Mason Jar
2 Tsp Cold Pressed Organic Neem Oil
2/3 Tsp Organic Castile Soap
Warm water
Long spoon or something to stir the mixture in the mason jar

1) Fill the half gallon mason jar almost to the top with warm water (the warmth helps integrate the oil and soap).

2) Add the soap to the water first (this matters - otherwise you will end up with a clumpy mess) and mix.

3) Put the long spoon into the water and start stirring, while stirring quickly, add the oil and mix well. After this you can put the lid on the jar and give it a few more vigorous shakes.

4) Using a funnel, add the solution to the spray bottle and then you are good to go.

You will need to shake it up a bit before spaying quite a few times, but it's really easy. As a precaution, it is recommended to test out a section of each plant before applying to everything. In some rare cases, the solution may interact negatively with the plant. I have not had that happen yet, but it's always better to be safe.


** I have recently become an affiliate with Amazon. So if you purchase an item from a link you find here, I will receive a very small percentage of the sale - with no extra charge to you. **


Wednesday, February 10

Easy Way To Start Seeds Indoors

 
Last summer a close friend of mine saved a TON of eggshells to start her seedlings in. She had a pretty cool setup going on and her seedlings thrived. She ended up with more tomato plants than she knew what to do with and passed some along to me. We were still in a townhouse at that time, so I could only take a few and placed them in pots. Wow, did those grow an amazing amount of tomatoes! Seriously - I vowed once I had a yard, I would do the same. 
 
So here we are...
 
 
First, I think it's important that I state right now - I have never grown a full sized garden on my own. Nope, never.
 
This year will be my first. When we were in the townhouse, Chris built a raised bed that was 1' x 10' behind the retaining wall near the back of our "yard" that I used to grow herbs, lettuce and radishes in. This worked a little bit, but it was kind of ridiculous. I had to climb up a small ladder to reach even the dirt (I might have fallen off said ladder a time or two...don't worry, it was a short one) so weeding was a major pain and the wooded lot behind us would get so overgrown, that unless we went back there with a chainsaw (remember - this wasn't technically ours - but we did do this once - shhhh!) the plants would not get enough sunlight. I still tried though - when there's a will, there's a way, right??
 
I'm always up for trying. I figure I don't have much to lose. We want to grow a massive amount of fruits and vegetables, enough so we can pass along or donate what our family doesn't need. I also want to do that as inexpensively as possible. This pretty much requires I start everything from seeds.
 
After researching this method, I've decided it's most definitely worth a try.
Even better - you can plant the whole thing - eggshell and all, right into the ground! 
 

The first thing we did was save every eggshell we could, rinsed them out and left them to dry on the counter.


I poked drainage holes in the bottom of each eggshell to prevent over watering. Looking back, it might have been better to use a darning needle, or at least something thinner than my digital thermometer. I broke a couple doing this.


Using organic seed starter soil, I filled each egg with a large spoon.


Different seeds need to be planted at varying depths, so for the more shallow seeds (usually the small seeds), I used my smaller shells and for the deeper ones, the larger shells. I also made sure to label and date each section. Plus I can really only focus on cold weather crops at this point. I plan on doing succession planting, so I need to know the dates.. That's not something my brain can handle on it's own. I can hardly remember what I did an hour ago.


Based off of the planting depth, I used an unsharpened pencil to make mini holes to place the seeds.


We set up an extra pantry rack we had in the garage next to our kitchen window. This way they will get plenty of sunlight. It also keeps them off of the kitchen table. I haven't even hit the tip of the iceberg yet as far as planting is concerned. We need to eat more eggs and get more shells going. I also picked up this cool little gadget that will make square blocks to start seeds in without needing a pot of any kind. I want to use that for the larger plants, but those won't go in until next month.
 
I'm not sure which container will work better - the plastic because the soil can later absorb excess water from the bottom, or the cardboard because it will absorb the excess water. I have been misting them with a spray bottle, so they are not getting saturated. I'll have to post an update once things start growing.
 
 So far it seems to be working. I did come home to an egg casualty tonight and a pile of dirt on my kitchen floor. Courtesy of Jackson the cat. Darn cat.

Wednesday, October 13

Winter Gardening Thoughts

My tiny garden pretty much completely died on me about a week ago. So I spent some time this afternoon clearing out the dead debris. It didn't take very long, it's only about 2 feet by 9 feet. The kids had a great time trying to pull all of the grass out of the backyard while I did this (I'm guessing that's what they thought I was doing???). Though I didn't get a whole lot of produce this year, I did learn a whole lot. This was the first time I ever tried growing food. To be honest, I can't even keep a cactus alive - true story. So the fact that I did get a whole lot of lettuce, radishes, carrots, 2 bell peppers, bowls full of cherry tomatoes, and an odd array of very miniature cantaloupe, watermelon and squash, had me very happy. I went into this project not expecting much more than to learn from my mistakes.

I'm kind of a nut when it comes to starting new things, and I pretty much go on information binges, trying to learn as much as I can in as little time as possible. Probably not the best, but it works for me. I happened to come across an article in an issue of Mother Earth News about winter gardening. So guess what I'm going to try? Hmmmm... I wonder... :)

The best part, I believe anyway, is that when I was rambling on about all my ideas to my grandma the other day. And told her about the book I wanted to find, she instantly asked me the authors name, and then ran (well, quickly walked) down to the basement and came back up with the exact book I wanted. How lucky am I? Plus, she had the cover I'll need for it, and it's just about the exact size I need it to be. Wow, it must be a sign that I was meant to garden in the winter, heh...
Oh, did I forget to mention that I need to climb on top of a chair to reach my little garden? Yup, it's behind a retaining wall in our backyard. I can't (because of association rules) have a garden in our itsy-bitsy backyard. Look at that sad tomato bush that's falling over the edge of the wall, lol. This was taken right before I cleared everything out. It's hard to see what's up there because of all the wild growth behind it - which I love to look at by the way, seriously, I think it's so pretty. Oh yes, and to the far right hand corner, the chair I climb - where there's a will, there's a way I suppose :)
Have a great day!


Monday, April 5

Grow Your Own Seedlings

**This a post from my other blog - Clearing Out The Stuff, that I felt could be carried over to this site as well**

This was a huge step for me! If you know me personally, then you probably know just how un-green my thumb really is. I have never been able to keep a plant alive - even the easy ones. This is a difficult area for me, and I know it's silly - so I'm trying super hard :)
As a fun project, my 5 year old son Austin and I decided to try and grow our own seedlings using an inexpensive greenhouse kit (to a more experienced gardener I'm sure this seems wastefull - but I've never done this before, and I wanted my son to see something, lol). This was so easy, we just poured water over the soil packets to make them expand, planted 2-3 seeds in each soil packet, and covered it with the lid - I didn't even have to water it the first week because it stayed so moist.

It's hard to tell from the photo, but everything sprouted, and quickly at that. This photo was taken 1 week after we planted everything. We have six different varieties, and 12 of each, leaving us with 72 plants, and no where to put them, lol. That issue led to me to container gardening and garden beds - but more on those later! We are three weeks out, and so far everything is thriving. It's my hope to have a bunch of fresh veggies this summer for my family. Knowing where my food is coming from, and the soil it's grown in is important to me - not to mention it will save us a lot of money over time if I freeze (or, imagine, learn how to can/preserve!) the food.